這次想要練習的是 Jenkins 的 Pipeline 專案,所以就先在 local 裝 jenkins windows 版本囉,安裝過程很簡單就不贅述
準備設置環境變數
在這個步驟主要是為了將在 command line 環境下所使用到的指令,都放在 path 內,讓系統可以自行尋找,而不需要每次執行都打上完整路徑
在檔案總管->電腦->右鍵內容,接著如下圖即可設定

以我自己的電腦為例,路徑如下
| command |
path |
| msbuild.exe |
C:\Program Files (x86)\Microsoft Visual Studio\2019\Community\MSBuild\Current\Bin\MSBuild.exe |
| vstest.console.exe |
C:\Program Files (x86)\Microsoft Visual Studio\2019\Community\Common7\IDE\CommonExtensions\Microsoft\TestWindow\vstest.console.exe |
| nuget.exe |
D:\art\developTools\software\nuget.exe |
- nuget 可於此處下載:安裝 NuGet 用戶端工具
- 推薦好用的小工具everyThing,可幫助快速找到檔案的絕對路徑
新增 pipeline 專案
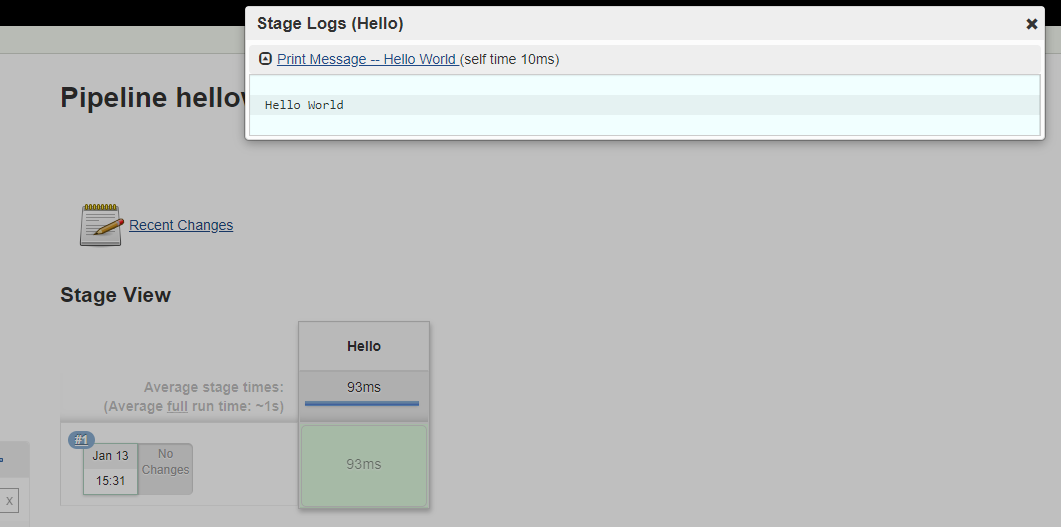
groovy 範例
透過最簡單的 hello world 範例來認識 pipeline,在下面的指令共有一個 stage,這個 stage 的動作就只有一個,顯示 hello world
1
2
3
4
5
6
7
8
9
10
11
| pipeline {
agent any
stages {
stage('Hello') {
steps {
echo 'Hello World'
}
}
}
}
|
取得原始檔案 (Git)
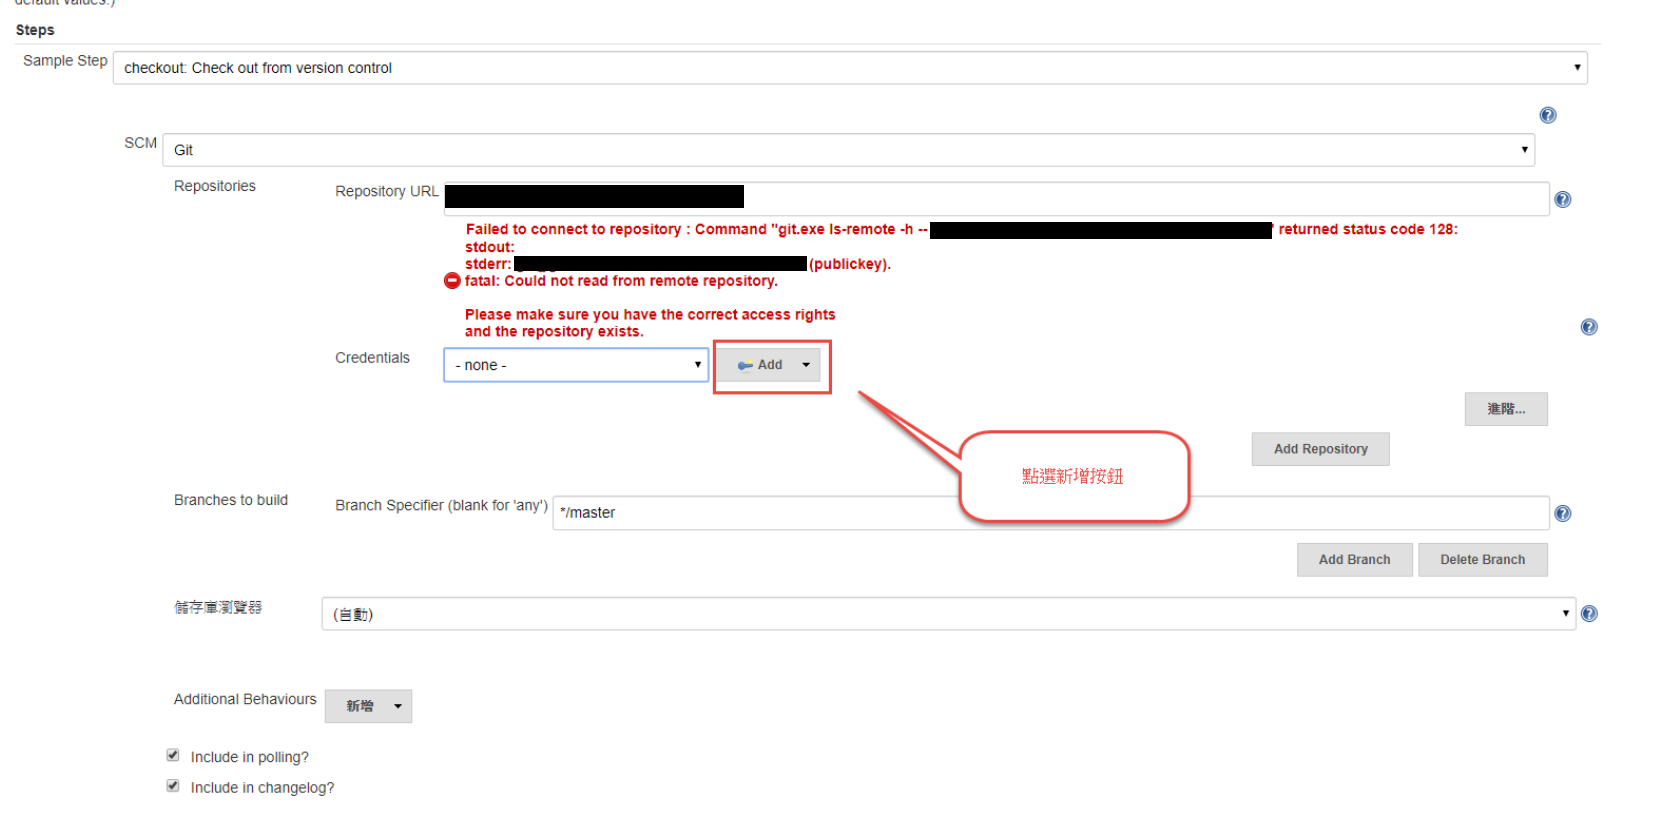
使用 Pipeline Syntax 的產生器來撰寫指令

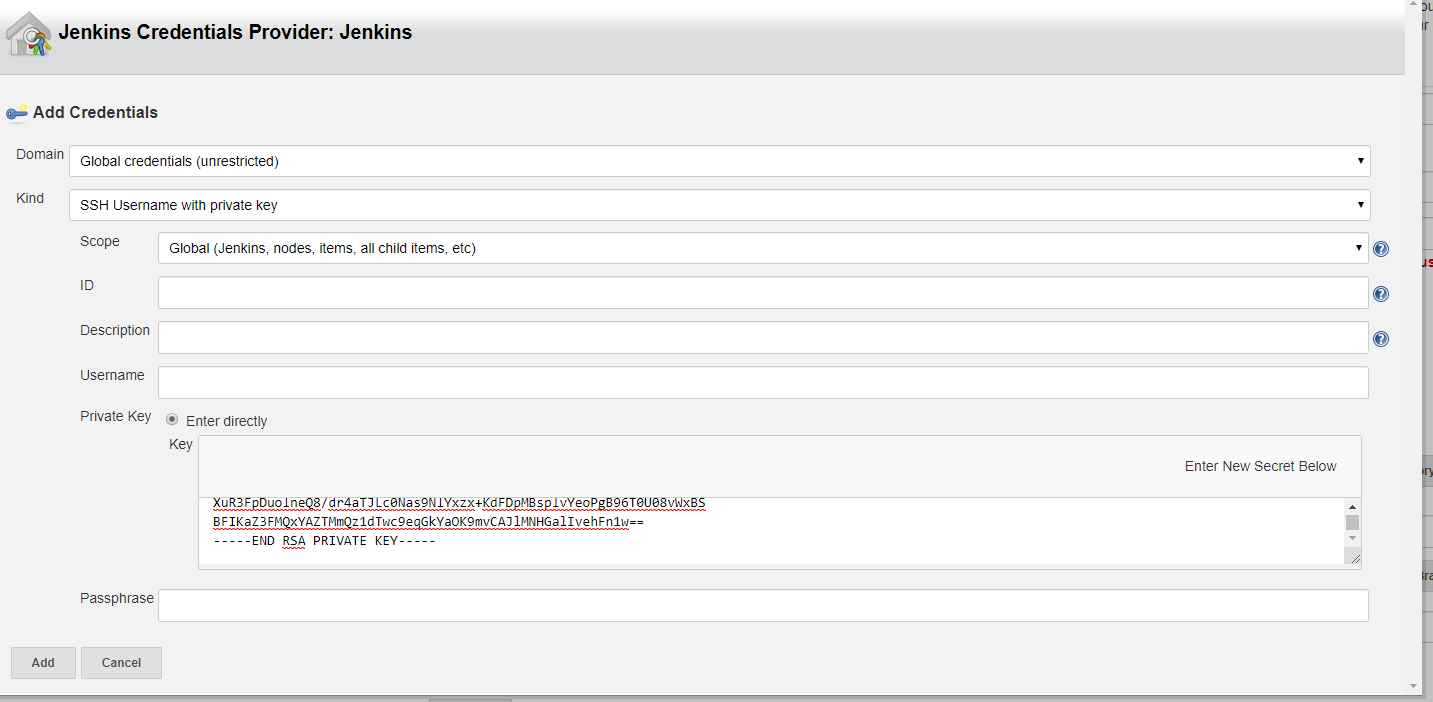
因為要從 Git 抓資料,所以選擇下拉選單項目:checkout: Check Out from version control;需要先自行建立憑證,此處利用 ssh key
private Key 就拿%userprofile%/.ssh/id_rsa的內容
點選下方的Generate Pipeline Script就會依照上方選擇的內容產生真正的指令碼

注意下方指令
- deleteDir()是另外加上去的,用來確保資料夾一開始都是空的
- checkout 指令的分支,目前這邊是寫死
origin/develop,也可事後利用參數化建置,用變數取代掉
credentialsId會因為 jenkins 主機上建立而不同,需要依照自己的情況帶入識別碼
範例的 repos 原本是公司的,所以儲存庫我改成隨便亂抓的一個網址
1
2
3
4
5
6
7
8
| stages {
stage('git') {
steps {
deleteDir()
checkout([$class: 'GitSCM', branches: [[name: 'origin/develop']], doGenerateSubmoduleConfigurations: false, extensions: [], submoduleCfg: [], userRemoteConfigs: [[credentialsId: '44ac570d-74df-471f-ac39-62f07b16b3be', url: 'git@github.com:art-Tests/MsgBoard.git']]])
}
}
}
|
還原套件 (nuget)
透過 nuget restore 指令還原套件,還需要指定公司自己的 nuget server 才可以順利還原,透過指定參數 source 宣告 nuget server
添加-source https://api.nuget.org/v3/index.json;http://nuget01.mynuget.art/nuget
這邊的範例是因為有自訂的 nuget server,沒有的話可以省略
ref:restore 命令(NuGet CLI)
1
2
3
4
5
6
7
8
| stage('nuget') {
steps {
bat label: '', script: '''
nuget restore -source "https://api.nuget.org/v3/index.json;http://nuget01.mynuget.art/nuget"
exit 0
'''
}
}
|
建置專案 (MoneyIn Build)
在建置專案的環節僅須透過 msbuild.exe 即可完成
1
2
3
4
5
6
7
8
| stage('build') {
steps {
bat label: '', script: '''
msbuild Web\\Web.csproj /p:OutputPath="D:\\MSBuildOut\\Web" /p:Configuration=Debug
exit 0
'''
}
}
|
移除不須上板檔案 (config)
原本公司的專案是將設定值放在_config目錄下,因此為了日常維護主機上的設定值,不要被每一次的發行設定覆蓋掉,所以在建置完畢之後,我們需要執行
- 刪除網站根目錄下的
*.config
- 刪除網站路徑:
_config/*.config
接著還需要將編譯出來的設定檔,複製到_config目錄,為了讓根目錄的 web.config 能夠指向_config/*.config,所以根目錄下的 web.config 我們需要先手動複製過去 IIS 目錄
如果只是一般的專案不想被覆蓋設定,其實就只需要刪除web.config就好了
1
2
3
4
5
6
7
8
9
10
11
12
| stage('移除不需上版檔案') {
steps {
bat returnStdout: true, script: '''
chcp 65001
del D:\\MSBuildOut\\Web\\_PublishedWebsites\\Web\\*.config /q
del D:\\MSBuildOut\\Web\\_PublishedWebsites\\Web\\_config\\ /q
robocopy Web\\_config D:\\MSBuildOut\\Web\\_PublishedWebsites\\Web\\_config *.* /E
exit 0
'''
}
}
|
上板
透過robocopy指令將檔案複製到 IIS 的網站目錄下
1
2
3
4
5
6
7
8
| stage('deploy') {
steps {
bat returnStdout: true, script: '''
robocopy D:\\MSBuildOut\\Web\\_PublishedWebsites\\Web\\ D:\\PublishSite\\Web\\ *.* /E
exit 0
'''
}
}
|
Final Setting
在此處調整了專案設定,改用參數化建置,利用參數來設定要發行的分支,底下是最終的設定指令,參數很多都改掉了,因為都跟公司有關,大致上參考用就好
1
2
3
4
5
6
7
8
9
10
11
12
13
14
15
16
17
18
19
20
21
22
23
24
25
26
27
28
29
30
31
32
33
34
35
36
37
38
39
40
41
42
43
44
45
46
47
48
49
50
51
52
53
54
|
pipeline {
agent any
stages {
stage('git') {
steps {
deleteDir()
checkout([$class: 'GitSCM', branches: [[name: '$Branch']], doGenerateSubmoduleConfigurations: false, extensions: [], submoduleCfg: [], userRemoteConfigs: [[credentialsId: '44ac570d-74df-471f-ac39-62f07b16b3be', url: 'git@github.com:art-Tests/MsgBoard.git']]])
}
}
stage('nuget') {
   steps {
      bat label: '', script: '''
      nuget restore -source "https://api.nuget.org/v3/index.json;http://nuget01.mynuget.art/nuget"
      exit 0
      '''
   }
}
stage('build') {
steps {
bat label: '', script: '''
msbuild Web\\Web.csproj /p:OutputPath="D:\\MSBuildOut\\Web" /p:Configuration=Lab
exit 0
'''
}
}
stage('移除不需上版檔案') {
steps {
bat returnStdout: true, script: '''
chcp 65001
del D:\\MSBuildOut\\Web\\_PublishedWebsites\\Web\\*.config /q
del D:\\MSBuildOut\\Web\\_PublishedWebsites\\Web\\_config\\ /q
robocopy D:\\MSBuildOut\\Web\\_config D:\\MSBuildOut\\Web\\_PublishedWebsites\\Web\\_config *.* /E
exit 0
'''
}
}
stage('deploy') {
   steps {
      bat returnStdout: true, script: '''
      robocopy D:\\MSBuildOut\\Web\\_PublishedWebsites\\Web\\ D:\\PublishSite\\Web\\ *.* /E
      exit 0
      '''
   }
}
}
}
|