SonarQube 程式碼分析工具 - 2022
先前在 2020 的時候為了練習程式碼分析工具,找到了 sonarQube 也因此撰寫了幾篇練習文章,但 2022 的今天在使用當初文章內的方法已經不適用了。可能是因為軟體更新的關係,所以這次特別紀錄一下重新練習的經過做個紀錄。先前的文章也就不再更新,將相關文章整理在左側選單,有興趣再去看。
Java 版本確認
SonarQube Server 只支援 Java 11 版本,所以如果用的是 Java 8,就需要先處理一下升級的問題。詳情請看Prerequisites and Overview
不知道版本的話可以透過 java -version 查詢
安裝 SonarQube
安裝服務現在來說簡單了很多,可以使用 docker 也可以直接下載,安裝過程都算簡單,照著最新的官網說明 Try Out SonarQube很容易就將服務建起來了,服務建立起來後,預設透過 http://localhost:9000,使用 admin/admin 就可以登入,第一次登入後自行變更密碼,就算完成了
但是這個只是方便測試使用,真正要應用還是需要像以前一樣,使用外部的 storage
如果是需要安裝在 linux 的教學,可以參考這一篇文章:SonarQube 搭建手記
From the zip file
Download and install Java 11 on your system.
Download the SonarQube Community Edition zip file.
As a non-root user, unzip it, let’s say in C:\sonarqube or /opt/sonarqube.
As a non-root user, start the SonarQube Server:
1
2
3
4
5
# On Windows, execute:
C:\sonarqube\bin\windows-x86-64\StartSonar.bat
# On other operating systems, as a non-root user execute:
/opt/sonarqube/bin/[OS]/sonar.sh console透過官網提供的壓縮包,解壓執行之後,可以在壓縮包內找到
bin/windows-x86-64/StartSonar.bat,執行後稍微等一下,他會幫你建立 SonarQube Instance,再之後透過預設的帳密admin/admin就可以使用了。但是預設內建的資料庫並不提供升級、擴展,要認真使用的話還是需要另外設置資料庫
Embedded database should be used for evaluation purposes only
The embedded database will not scale, it will not support upgrading to newer versions of SonarQube, and there is no support for migrating your data out of it into a different database > engine.
安裝 PostgreSQL
直接於此處下載 windows 版本,但直接安裝的話,會在快結束時發生failed to loaded SQL module錯誤,參考下面兩篇文章後照著做就可以了
- Failed to load sql modules into the database cluster during PostgreSQL Installation
- windows 安装 Postgresql 记录
1 | net user /add postgres root |
當然新增了這個 postgres使用者之後,還需要去設定他的密碼,在管理介面設定一個就可以了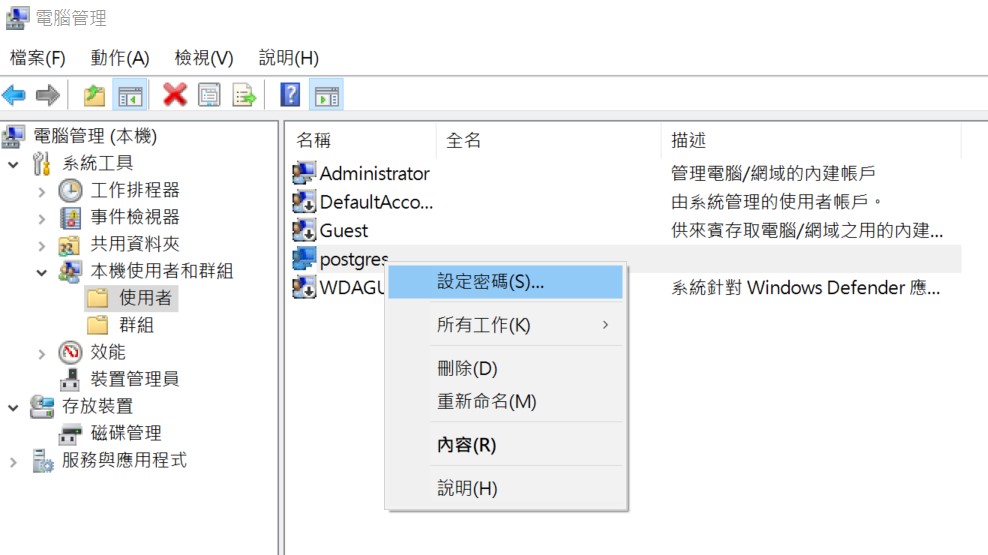
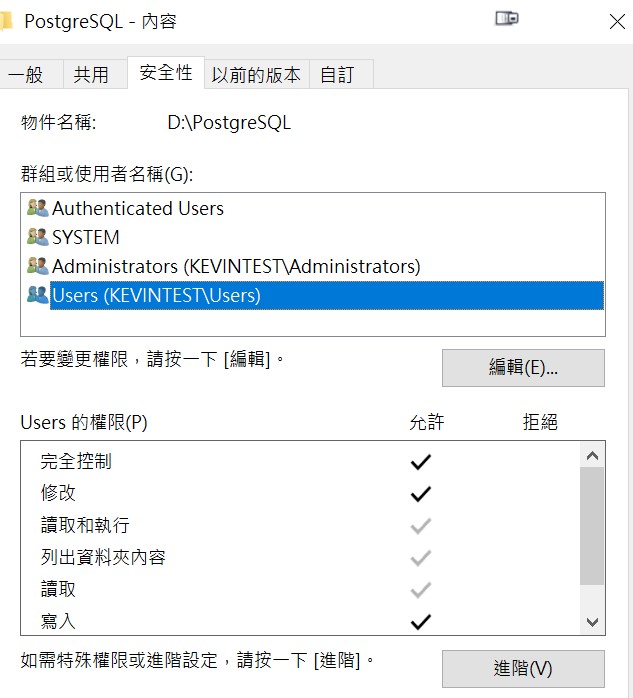
接下來先新增目錄D:\PostgreSQL\並修改 admin , users 的權限都為完全控制,因為又有一次失敗的經驗,所以我新增了一個 NetWork Services 也一併設定完全控制

然後先重開機
重開機這個步驟,很重要。
重開完畢後用 postgres 執行 cmd , 等等要用這個 CLI 安裝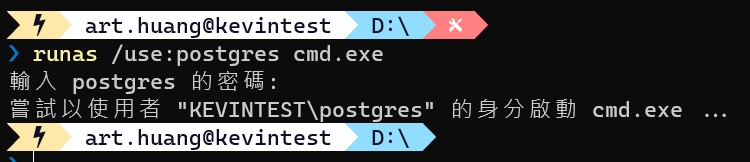
1 | D:\postgresql-15.0-1-windows-x64.exe |
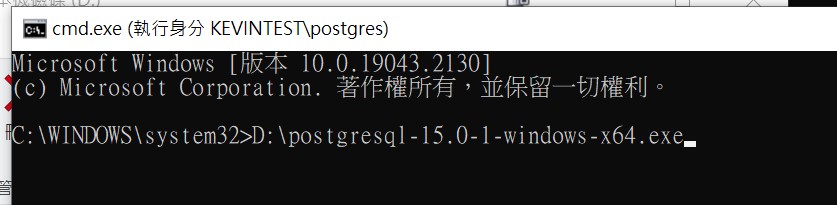
並把安裝目錄設定為剛才新增的 D:\PostgreSQL\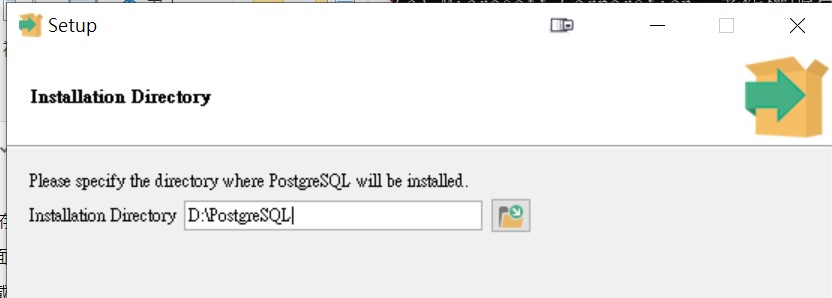
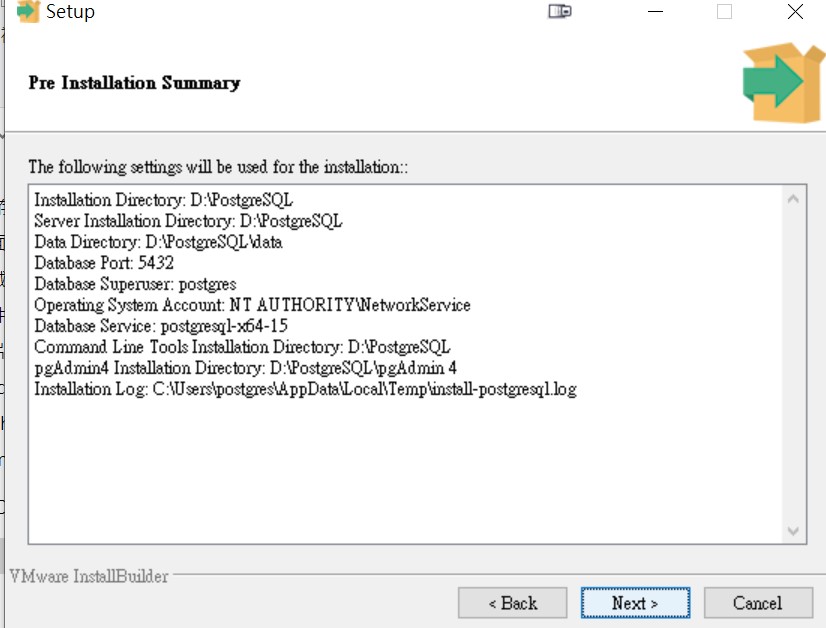
安裝過程中應該就不會出現錯誤了,接著就把剛剛新增的 windows 使用者帳號移除就行了
補充:安裝 PostgreSQL
另外一個情況是已經安裝好了某版本,但沒有建立資料庫,windows 服務也沒有
這邊提供幾個參考連結:
- How can I start PostgreSQL on Windows?
- How to find out if a directory is a valid PostgreSQL cluster
- How to run PostgreSQL as a service in windows?
- PostgreSQL pg_ctl register error under Windows 7
濃縮以上幾篇重點
- 先找到安裝 postgreSQL 目錄,為的是要知道相關工具的路徑,最好是將它設定為環境變數 path 之內
- 先確認 services.msc 當中有沒有 postgreSQL 服務,沒有的話就需要自己建一個,建立服務之前會需要新建 DB
- 建立資料庫可指定新的目錄,例如:
initDB -D "D:\postgres-data" - 建立完成後可透過
pg_ctl.exe -D "D:\postgres-data" start -U sonar -P sonar -S auto測試一下能否運作,可以運作的話就可以接著下一步做成 services (範例的 sonar 需要先建立) - 用管理者權限執行
pg_ctl.exe register -N "PostgreSQL" -U "NT AUTHORITY\NetworkService" -D "D:\postgres-data" -w,該目錄開啟完全控制給 NETWORK SERVICE
`
建立 PostgreSQL 使用者及資料庫
習慣上會為了服務來建立一個專屬的帳號使用以控管權限,這邊也從善如流,建立一個叫做 sonar 的帳號用它提供給 sonarQube 使用
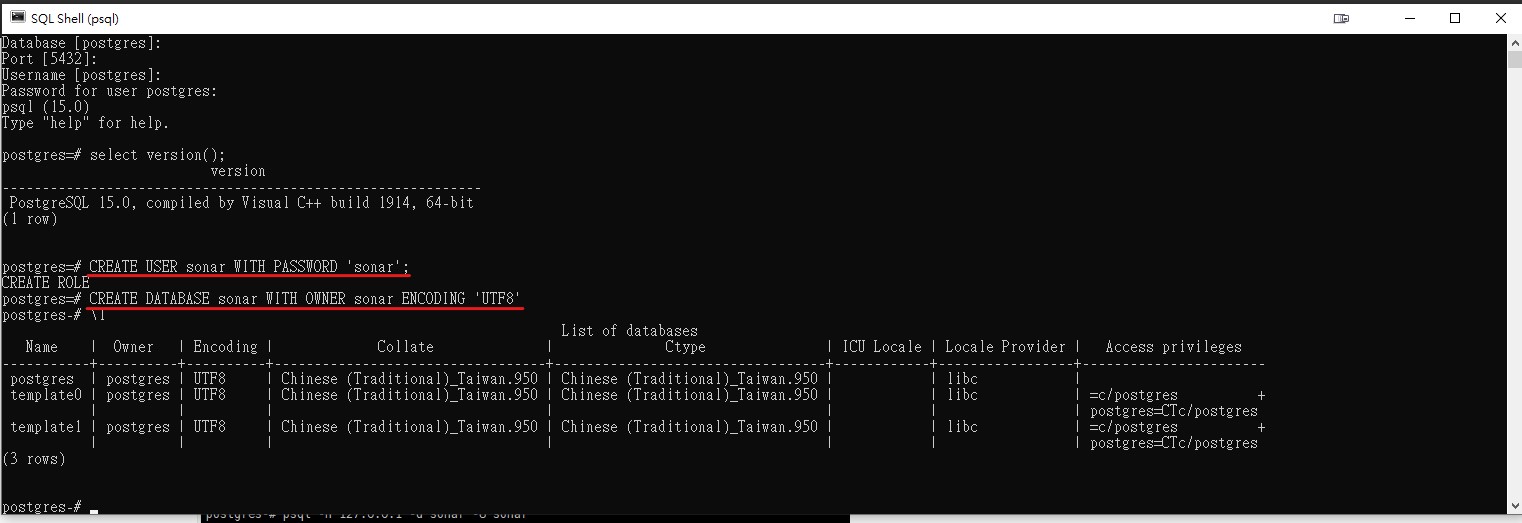
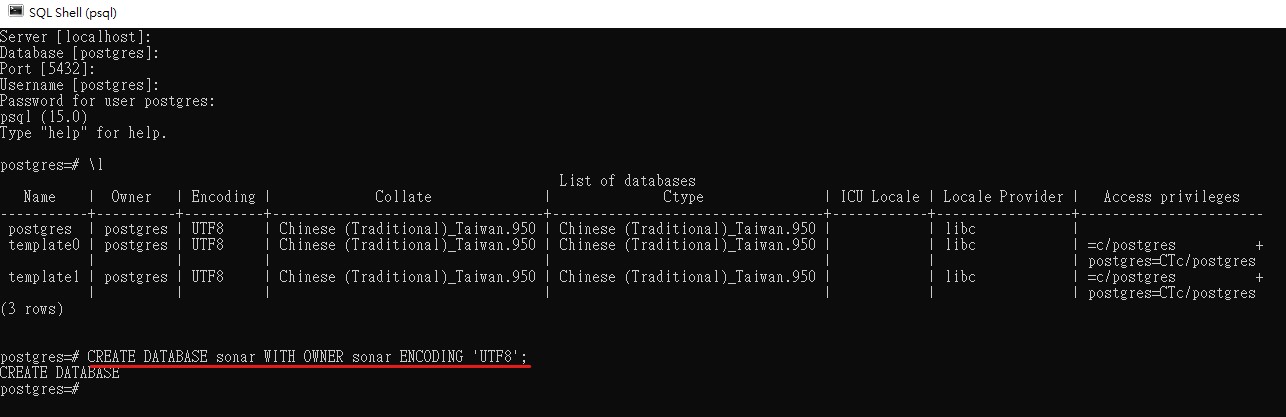
這邊我也不知道為什麼第一次建立資料庫沒出現回應,所以又做了一次,重新開 psql 改用 sonar 做登入,測試成功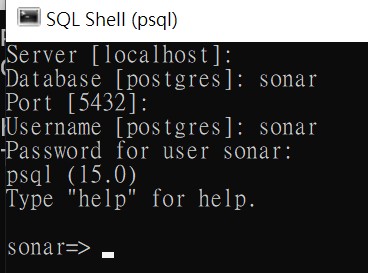
如果連線有問題,可以考慮調整一下設定,將 local 都設成允許,但如果放在不同IP上,就要自己再研究一下怎麼設定了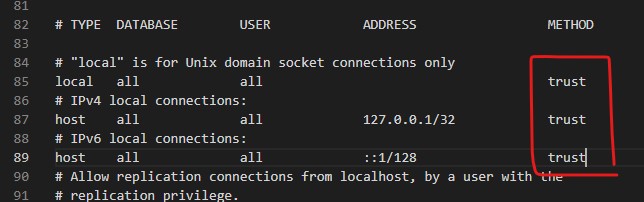

修改 sonarQube storage 為 PostgreSQL
設定檔位於剛才的解壓縮目錄下, conf/sonar.properties 這個文字檔,文件中有詳細的註釋可參考,因為打算採用 postgreSQL,我們所需要關心的參數只有下列這三個 (因為它也支援環境變數的設定,只需要把參數名稱變成大寫,且連接符號改為底線,就可以透過環境變數來控制,這一點可以比對參考一下 docker-compose 那邊的設定)
1 | sonar.jdbc.username=sonar |
註冊 sonarQube 服務
官方已經有提供 windows 使用者一個方便管理服務的批次檔,相關說明可以參考Operate Server,因為怕關聯的網頁又改版 404,所以把指令貼在下面
1 | 安裝、移除服務 |
當然也可以透過 services.msc 管理服務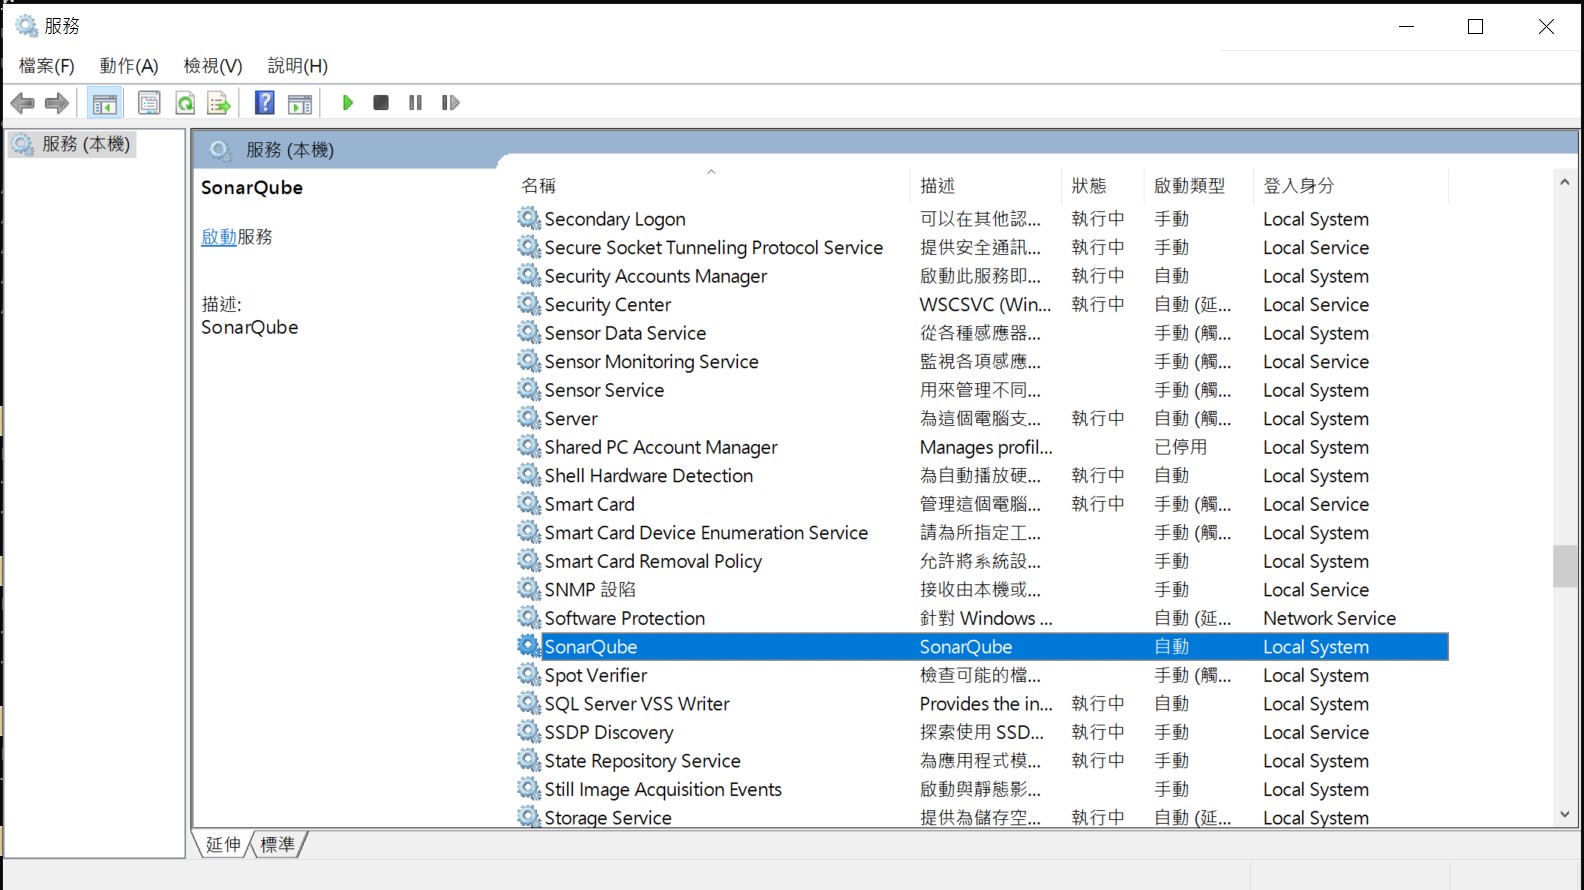
如果是在 java 8 的環境下要跑 sonarQube server , 請額外設定環境變數SONAR_JAVA_PATH指定 java 11 的路徑即可執行上述相關指令
1 | set SONAR_JAVA_PATH=D:\java\11\bin\java.exe |
docker
1 | docker run -d --name sonarqube -e SONAR_ES_BOOTSTRAP_CHECKS_DISABLE=true -p 9090:9000 sonarqube:latest |
如果用 docker 只需要一行指令就行了,相較於以往的 docker-compose 還需要另外建立 storage,現在的安裝步驟無疑變得非常單純,但是這只能做為測試開發使用,比較適合用來熟悉這套工具的初學階段,如果是真的要搭配 CI/CD 環境,應該還是要使用獨立的資料庫來儲存專案分析資料。
指令加上 restart,可參考Start containers automatically
我從官網複製他的範例Docker Compose.yml file example後,調整port改9090
1 | version: "3" |
如果碰上了 elasticSearch 的錯誤提示 bootstrap check failure [1] of [1]: max virtual memory areas vm.max_map_count [65530] is too low, increase to at least [262144],可以參考下列解法將數值設大一點點
1 | wsl -d docker-desktop |
上述的這個方法在我重開機之後失效,所以又接著查詢了一下,因為我採用的是 windows 環境的 wsl2 版本
1 | wsl -l -v |
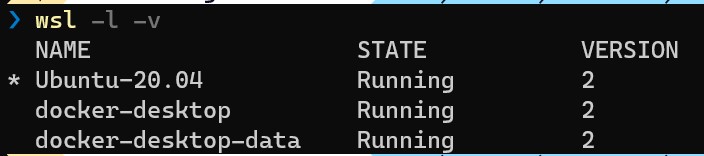
所以我需要設定給 docker-windows的設定檔是要用 .wslconfig,該檔案的存放位置是在 %userProfile%
從 docker-windows 的設定也可以看到這一點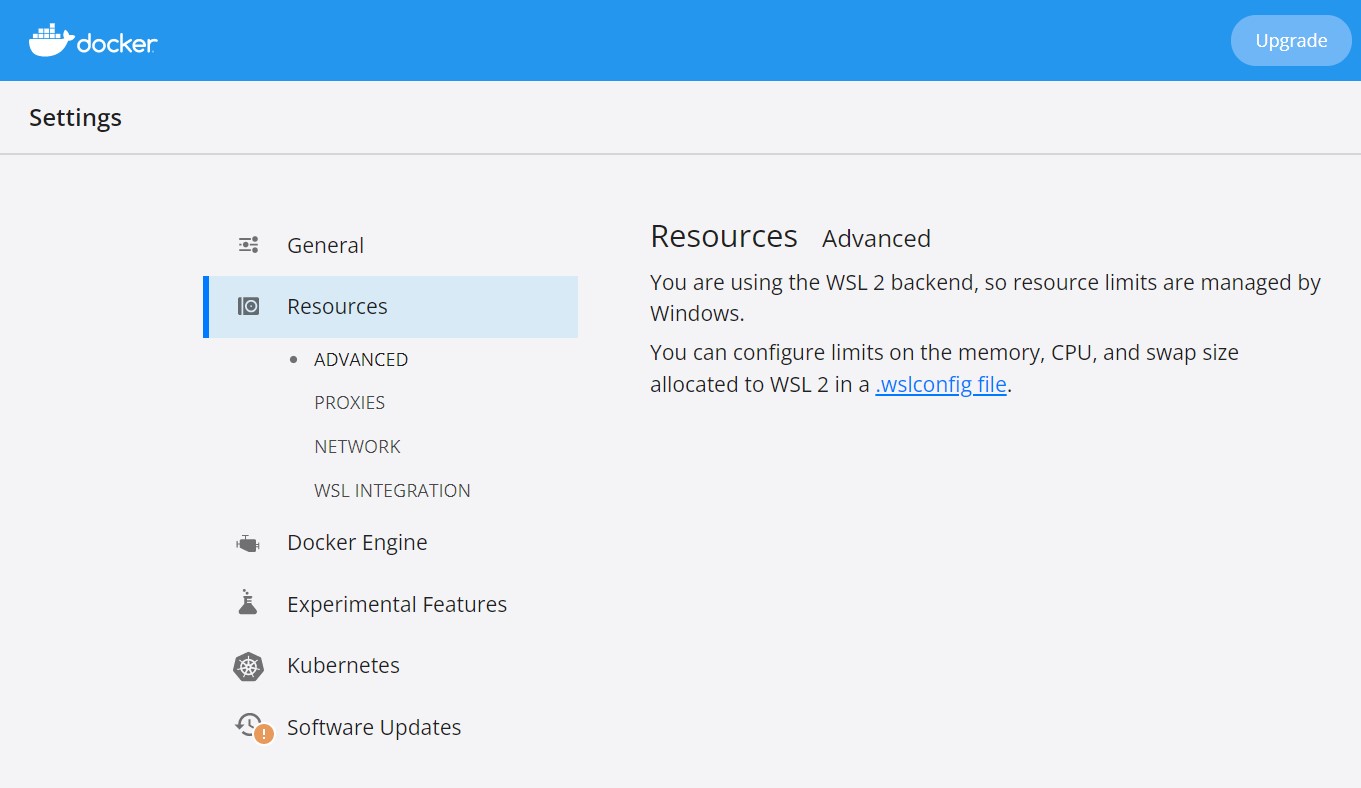
至於其他的設定的部分,想了解的可以參考網站說明:Configuration setting for .wslconfig
1 | [wsl2] |
the file path is
C:\Users\<UserName>\.wslconfig
設定完成之後重開 wsl 以及 docker-windows
1 | Get-Service LxssManager | Restart-Service |
建立分析專案
分析專案的步驟與先前文章介紹相同,因為社群版只支援手動設置,所以請選擇 Manually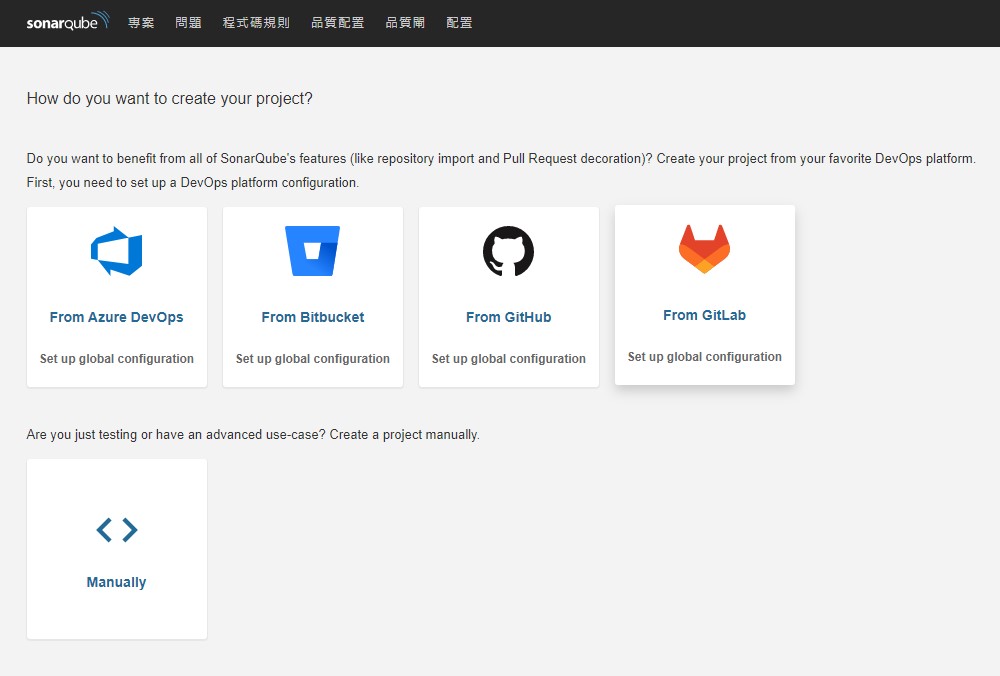
設定專案名稱、以及唯一識別碼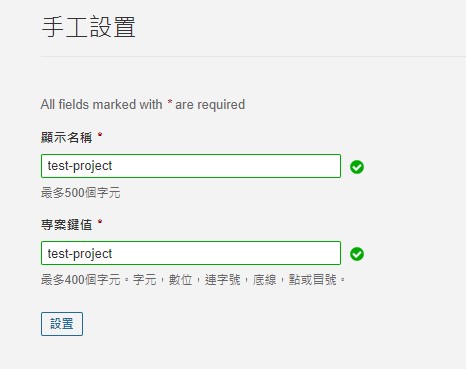
接下來詢問如何分析,選擇本地分析 Locally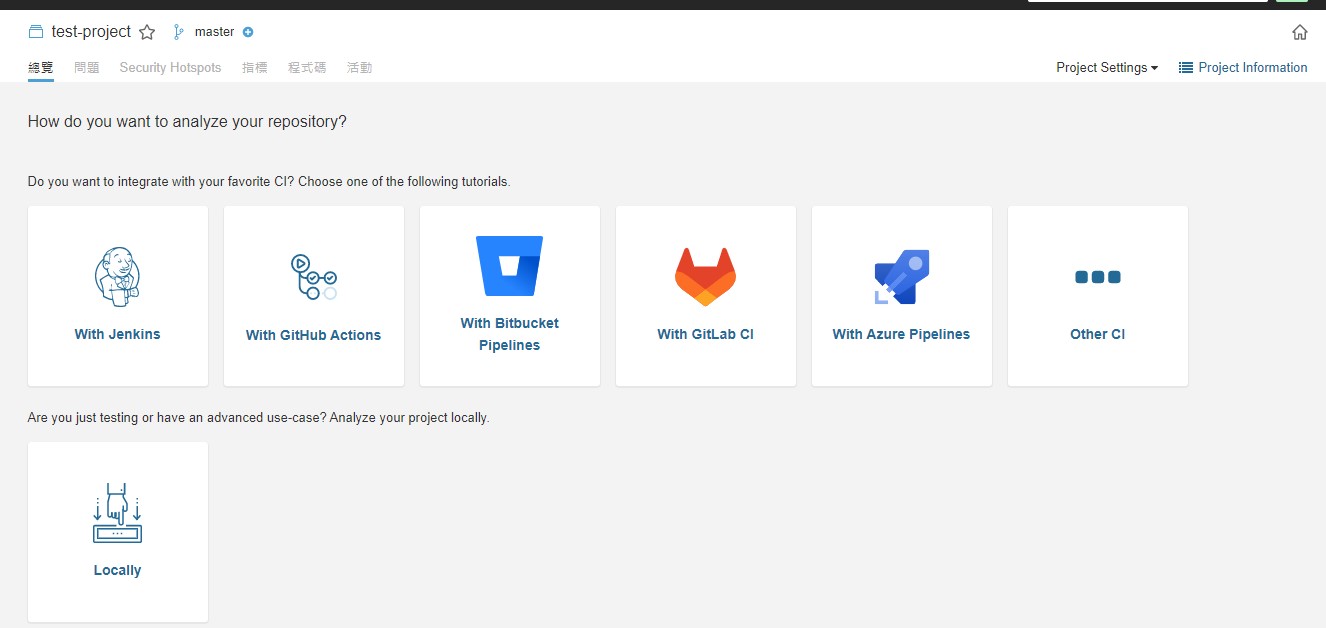
設定 Token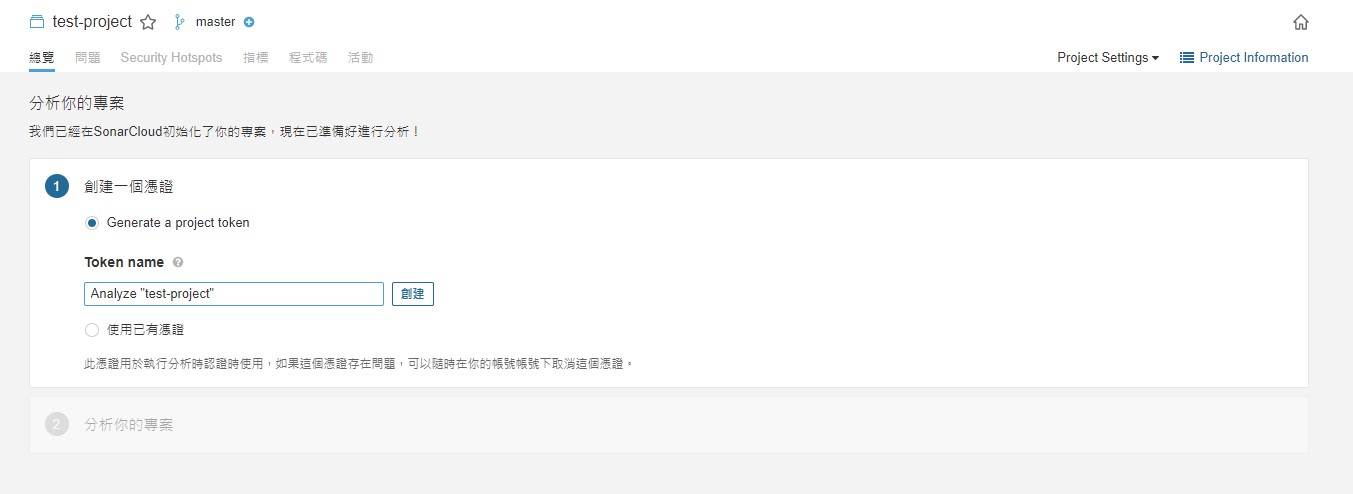
Token 產生完畢,這個只會顯示一次,請記好,否則就要再重新產生一個新的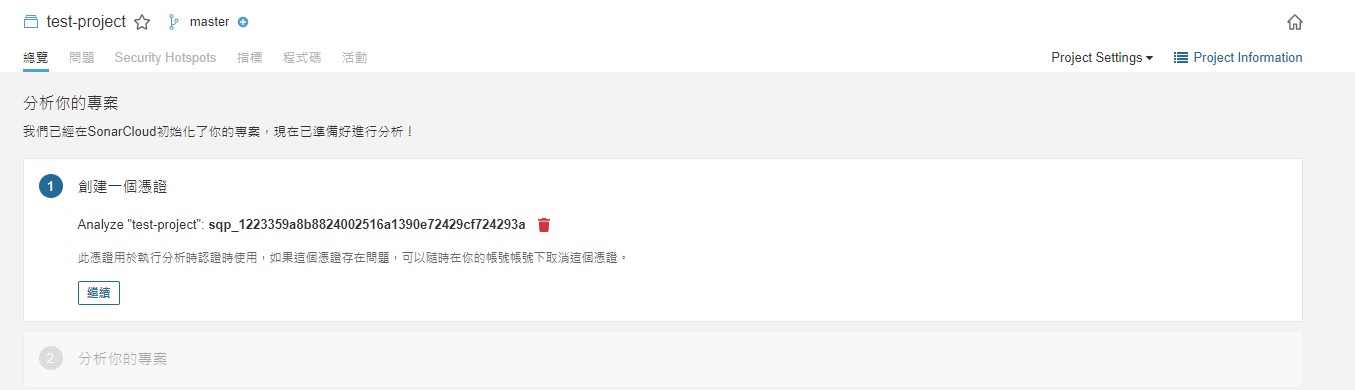
接著選擇專案類型,這裡是用 C# .net Framekwork 作範例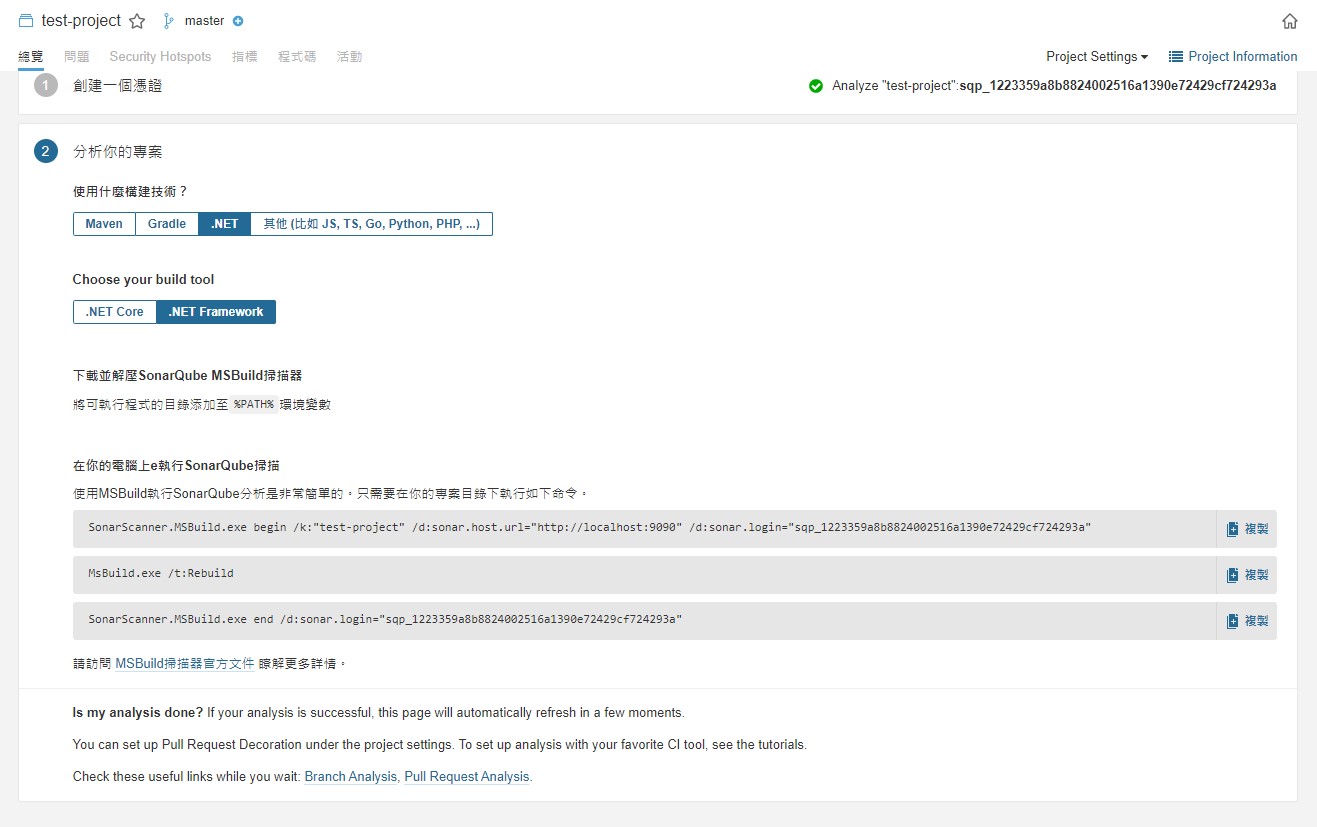
屬於 sonarQube 的分析專案設定就到這邊就告一段落,接下來就是依照顯示的
- 準備 scanner
- 執行分析
SonarQube Scanner
從上個步驟的連結可以看到文件有提到因應 sonarQube 服務的版本不同,也需要下載不同版本的 scanner,當中也特別說明了,要使用哪一種 scanner 與專案並無關係,因為版本是取決於安裝在電腦上的 .net SDK 版本
在 .net 的部分可以使用 msbuild 或是 dotnet 其中之一,我這裡選擇的是 msbuild,也就是下面這張圖的語法
因為這份連結文件是 local 的,所以也提供線上的文件SonarScanner for .NET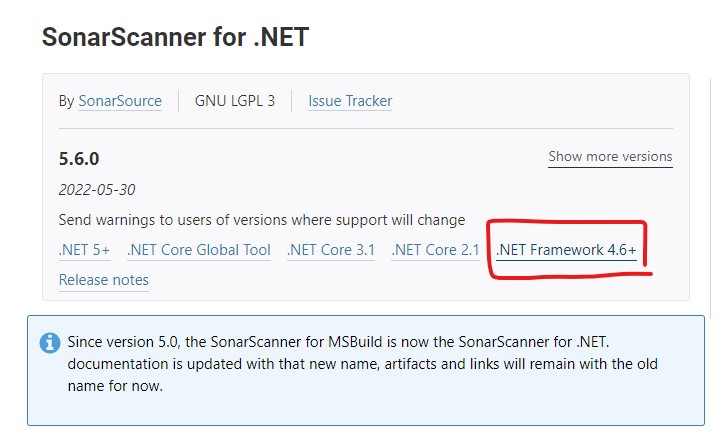
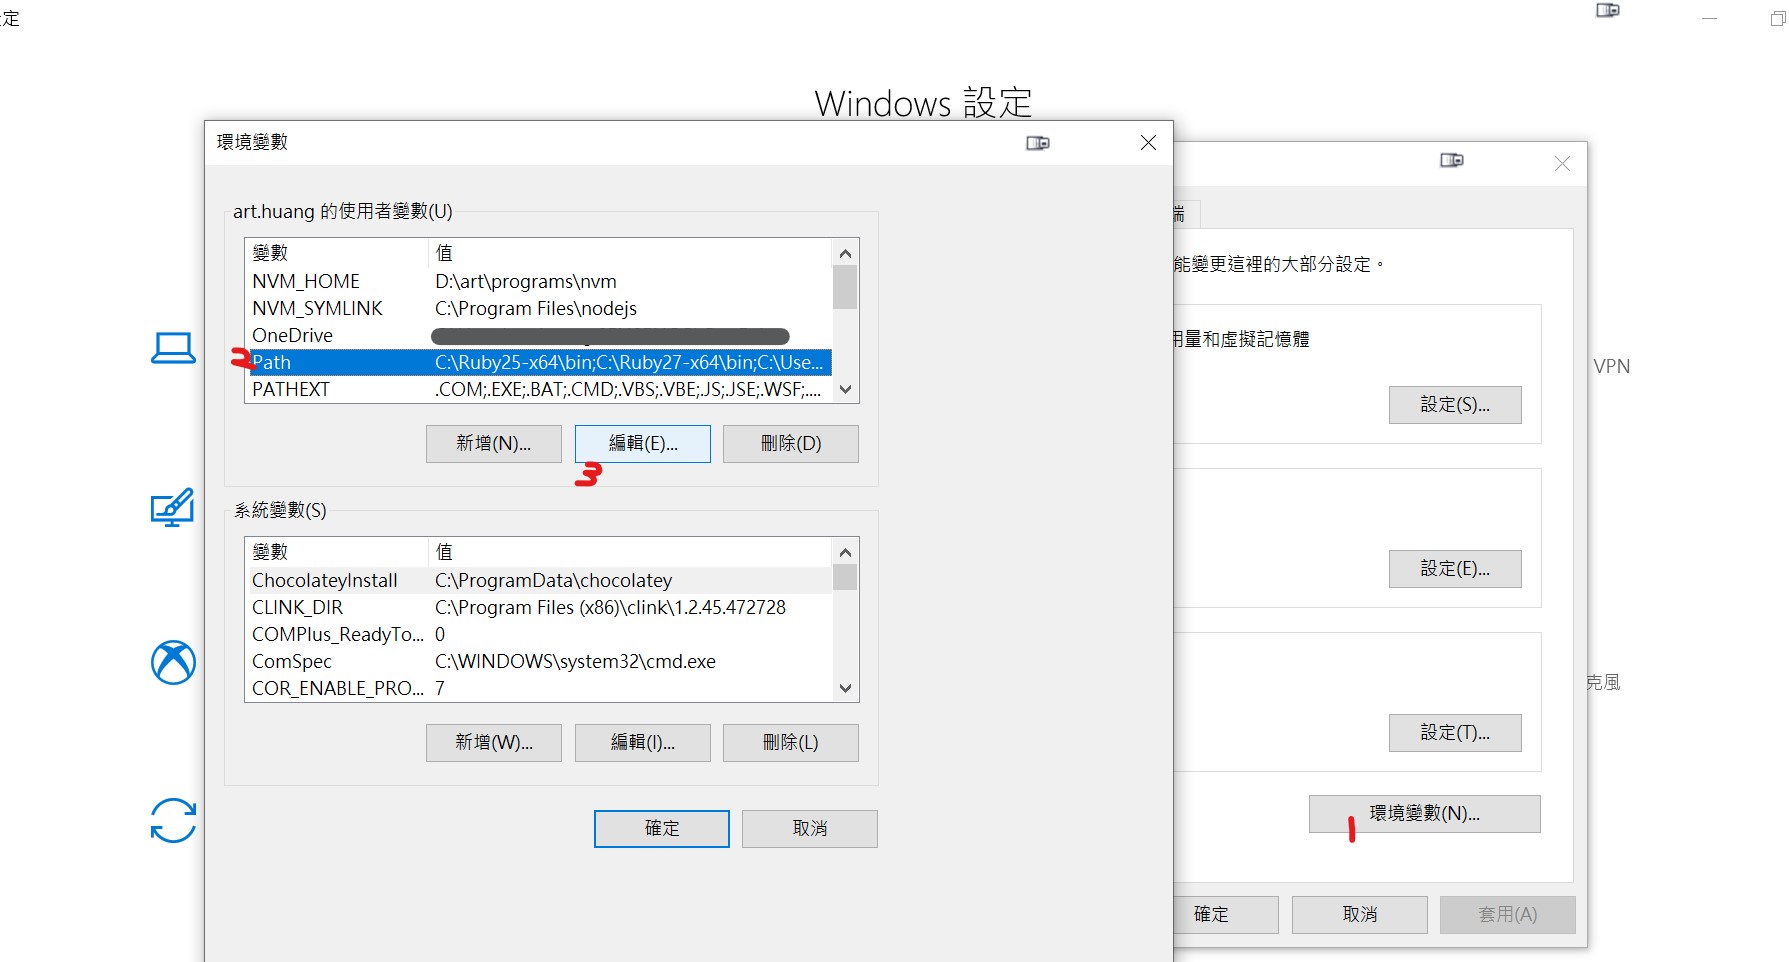
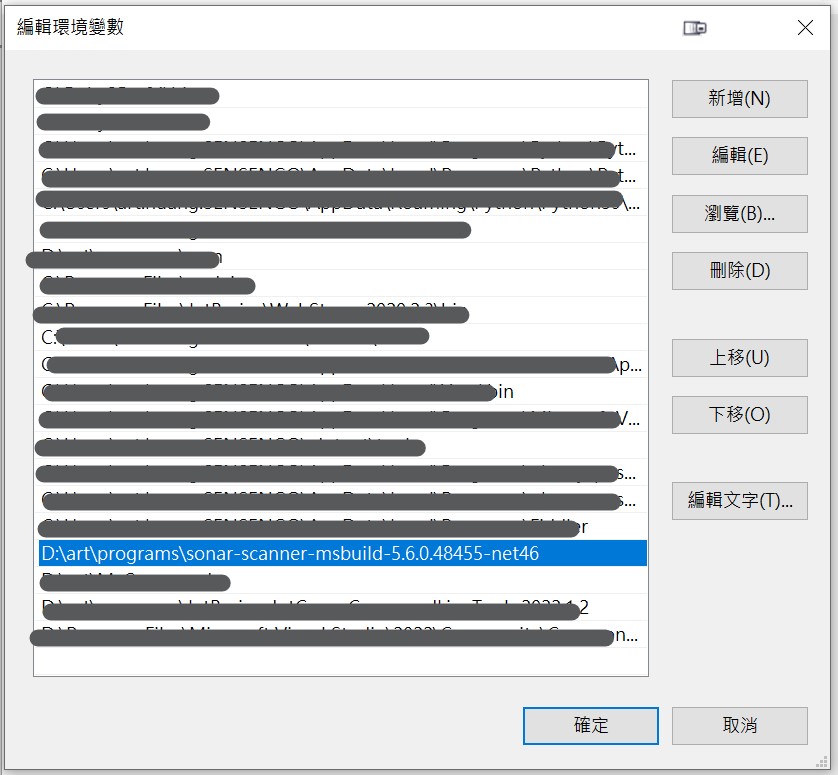
在這個地方可以看到.NET framework 4.6+,將 scanner 下載解壓縮後,將該目錄設置環境變數 path,方便後續執行指令可以不用打完整路徑,環境變數的設定可以在 Windows 設定搜尋編輯環境變數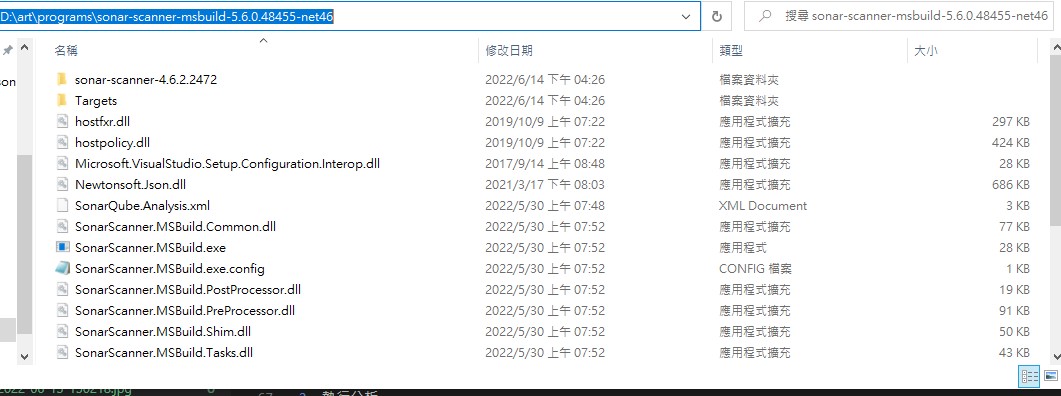
因為 scanner 只支援 java 11 或 17,所以執行之前需要設置環境變數 JAVA_HOME 為 java 11 的路徑,例如
1 | set JAVA_TOOL_OPTIONS=-Dfile.encoding=UTF8 |
DotCover Cli tools
sonarQube 沒辦法自己做程式碼覆蓋率,但他可以讀取其他工具的報告來整合在自己的專案分析中,所以這邊使用的是我先前用過的 dotCover cli tools
在此處下載最新版本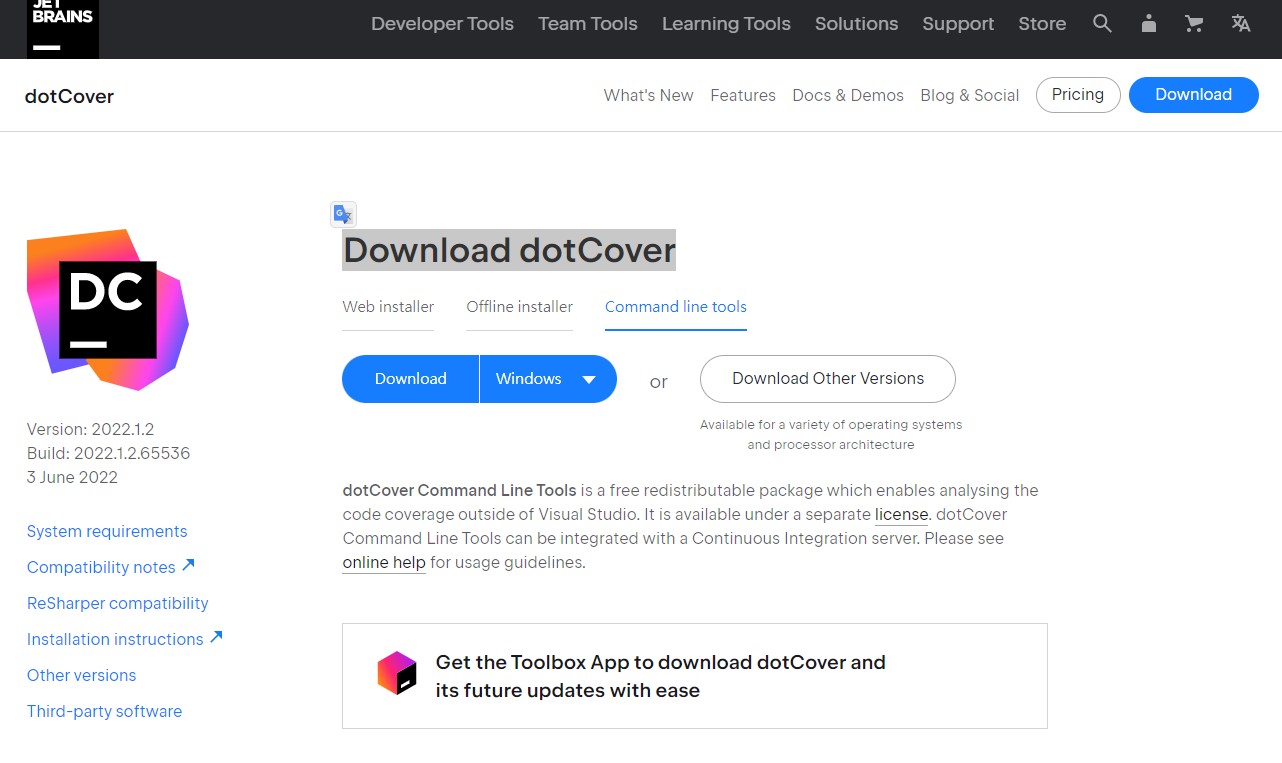
如同剛剛的步驟解壓到自訂路徑,並設置 path 環境變數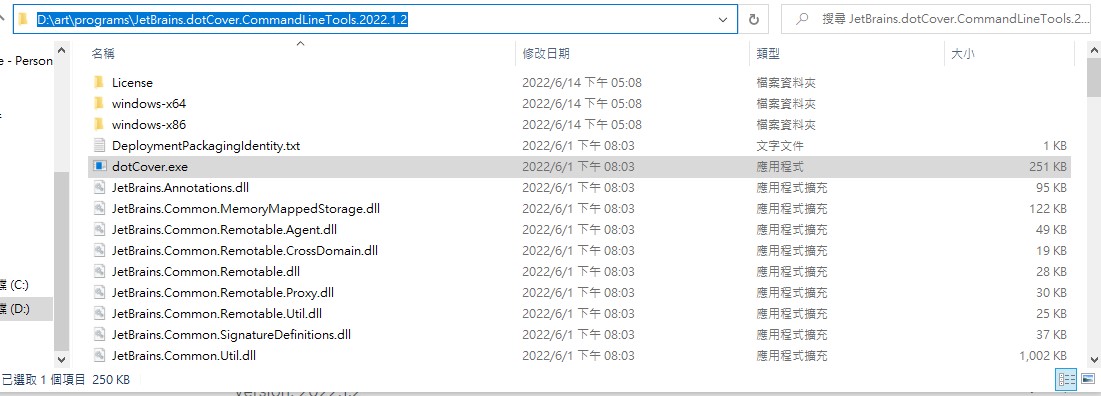
程式碼覆蓋率
如同SonarQube-測試報告的產生提過的四個步驟
,除了在一開始就要設定好產出報告的檔名,後續透過 dotCover 執行程式碼覆蓋率也需要正確產出 HTML
下面的指令模擬了解決方案中,有多個測試專案的處理方式,需要個別產生報告,接著合併後,再轉為 HTML
1 |
|
REF
單元測試數量
C# 單元測試則是透過 vstest.console.exe 來產生報告,範例如下
1 | vstest.console.exe /Logger:trx "myProject.Adapter.Test\bin\Debug\myProject.Adapter.Test.dll" |
注意事項
javascript分析需要node.js版本大於12.22以上- 單元測試產出的報告(
TestResults/*.trx)需要每次分析後刪除,否則資料會隨著分析次數一直累加上去
排除檔案
建議先稍微看一下Narrowing the Focus,如果有排除的檔案不想被分析,可以透過分析專案的設定來排除
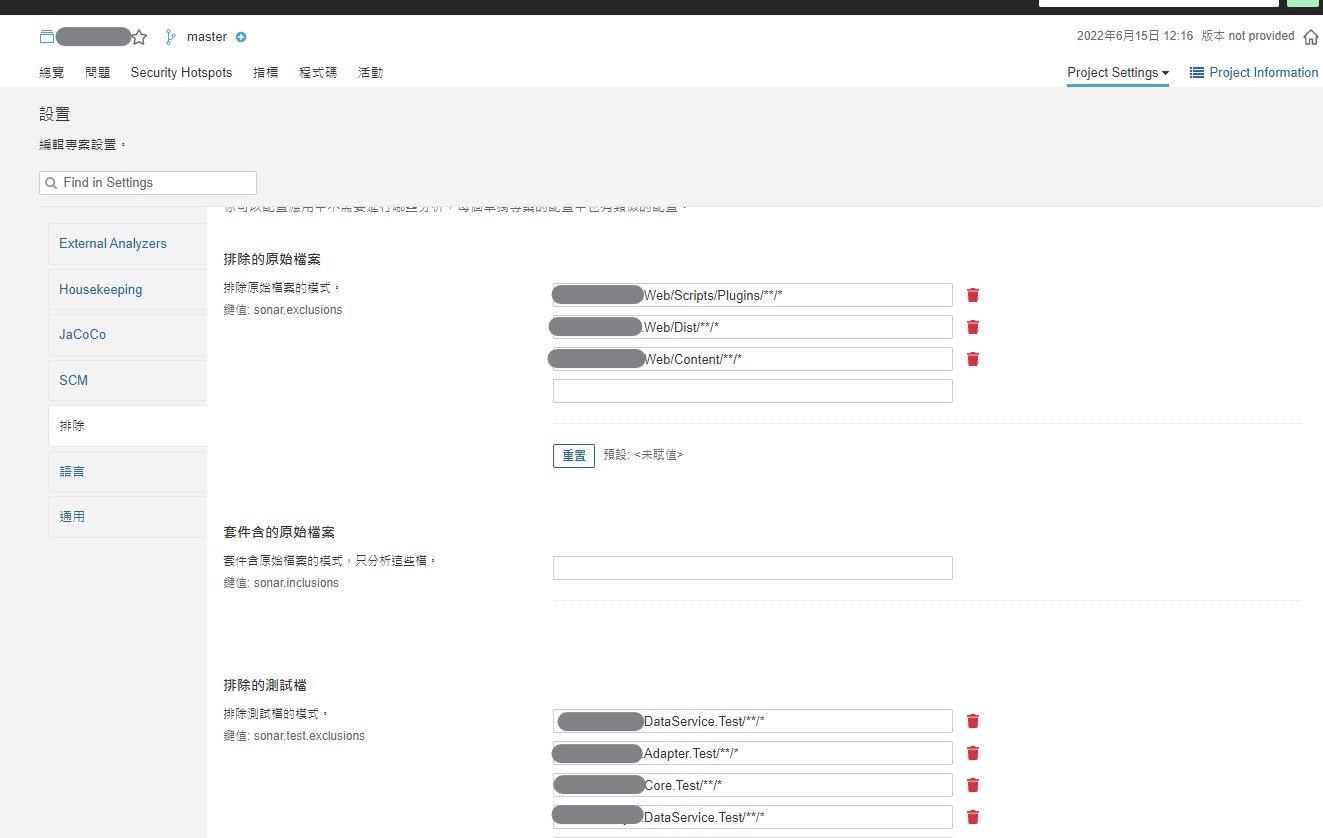
或者是使用參數,如下列指令的/d:sonar.exclusions參數
1 | SonarScanner.MSBuild.exe begin |
又或者是在sonarQube全域進行設定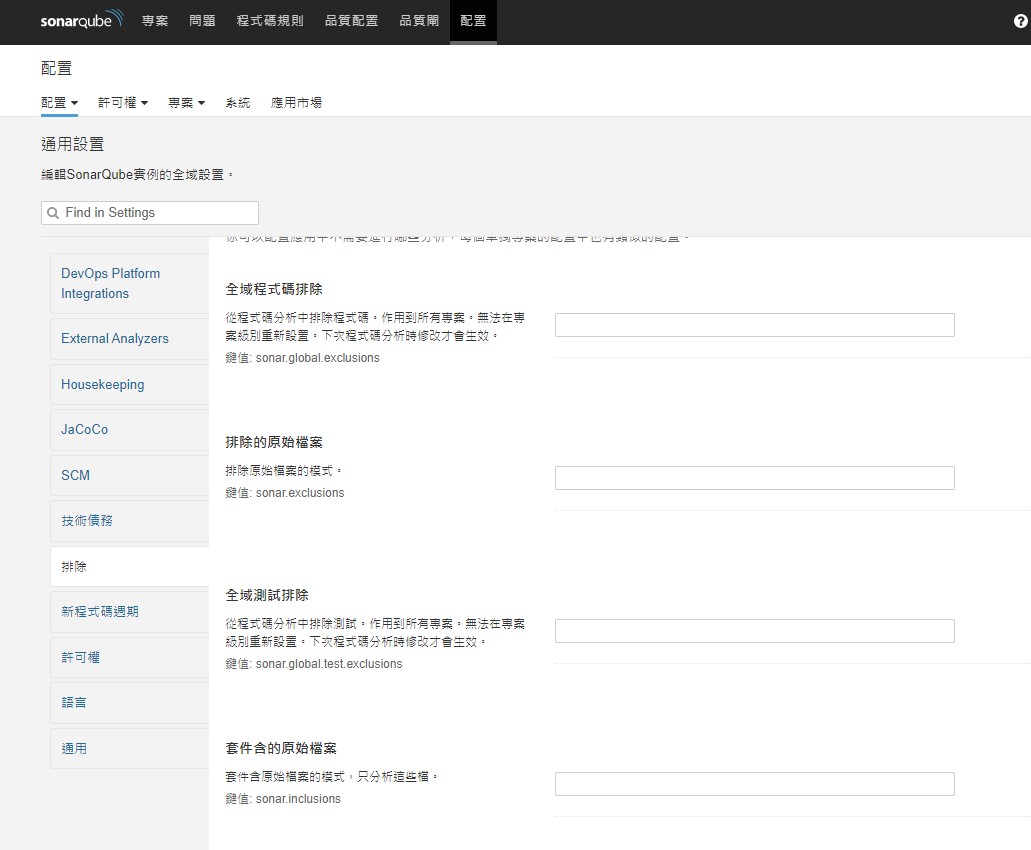
| 類型 | 排除指令 | 範例 |
|---|---|---|
| production code | sonar.exclusions | sonar.exclusions=”myTestProject/Scripts/Plugins/**“,”myTestProject/Content/**“ |
| test code | sonar.test.exclusions | sonar.test.exclusions=”myTestProject.DataService.Test/**/*“,”myTestProject.Adapter.Test/**/“,”myTestProject.Core.Test/**/“ |
上面這個表格其實口語化一點就是,你自己寫的 production Code 如果有一些不想要他分析的話,像是第三方前端套件下載下來,如果它還去分析就很不必要了,就可以透過 sonar.exclusions排除掉;如果是自己寫的一些測試程式碼不想要分析,則是用 sonar.test.exclusions。如果有多個 pattern 要比對,用逗號分隔開就行了
問題排除
官網提供的就是這幾個簡單的情況
但我碰上的情況是跟這一篇相同:java.lang.IllegalStateException: Line 588 is out of range in the file,簡單來說就是明明檔案只有 100 行,但提示錯誤在 101 行,網友回復也很絕,那就把提示的檔案再加一行就行了。往下看也看到有人說是需要把一些檔案清掉。我則是在分析的目錄下,將產生出來的 .sonarqube目錄、跑測試產生的 TestResult目錄都清除
因為測試跑一次分析有點久,所以這兩種方式我同時採納,嘗試過後的確有效,至於哪個才是關鍵因素,那就不研究了。
成果
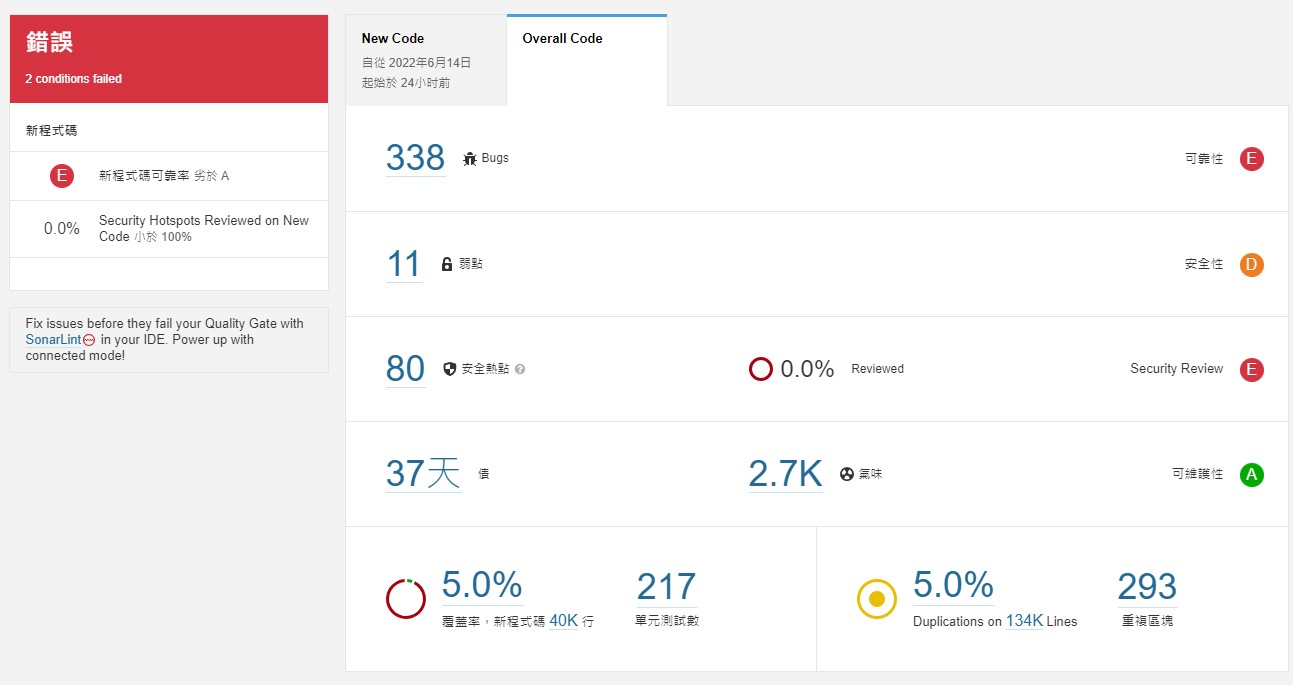
每一次執行分析都需要打一堆指令就很煩,對於自己 local 開發測試使用,還是最好將指令做成批次檔,每次想檢查的時候執行比較好,之後如果需要上 CI/CD,也可以用 CLI 的方式在略微調整就可以上線,我其實比較不喜歡用包裝起來的 jenkins package 的指令
關於 nvm 的部分則是因為筆電硬碟空間不夠,而用習慣的套件都還在舊版本的 node.js,如果有持續在更新且沒有硬碟空間困擾的人應該是不需要做 nvm 切換
完整分析指令範例
1 | @REM sonarqube.bat |
補充:停用專案分析規則
事情是這樣的,分析 vue 檔案的時候,因為先前用的是 rider 右鍵自動產生出來的範本,所以會固定產出 style 區塊標籤,但其實不會每個都需要用到,當初並沒有想太多就這樣簽入了,而現在被分析出來說這是不符合規則:CSS files should not be empty,這邊就用這個例子示範一下怎麼停用這一條分析規則
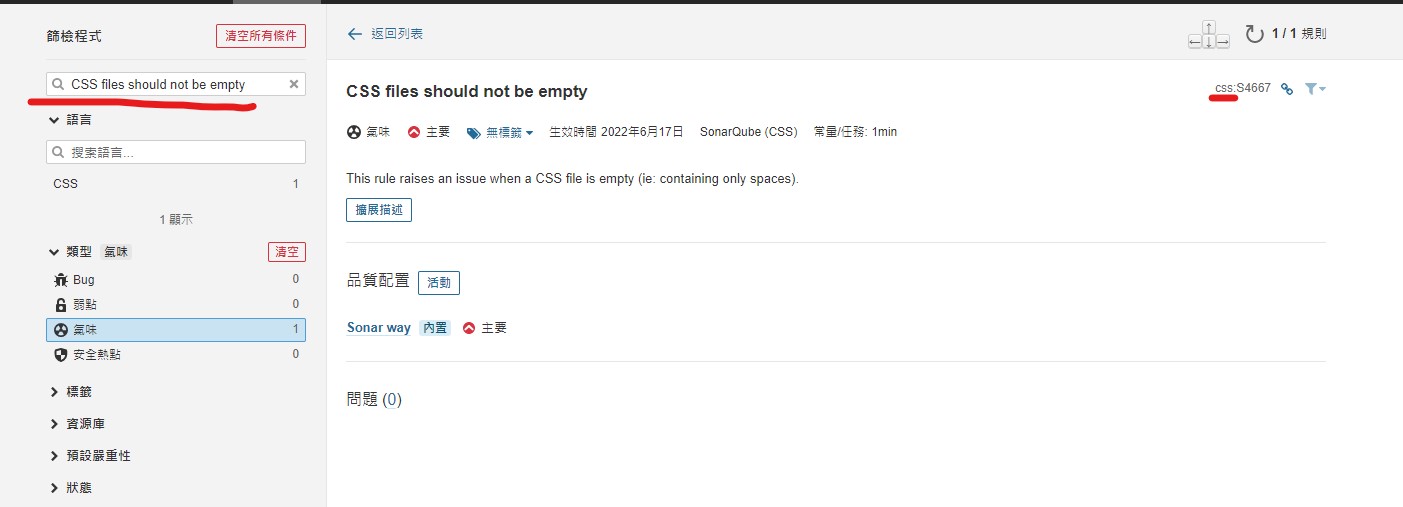
首先將該規則找到,透過上圖的方式,在左上方搜尋規則名稱,出現的列表中點明細查看資訊,可以看到右上方會出現這個規則是哪一個語言

到品質配置頁籤,將該規則複製一份,這就是我們要修改的對象
複製出來的對象點一下,進到這個頁面,再看自己要修改什麼去點那個超連結就行了
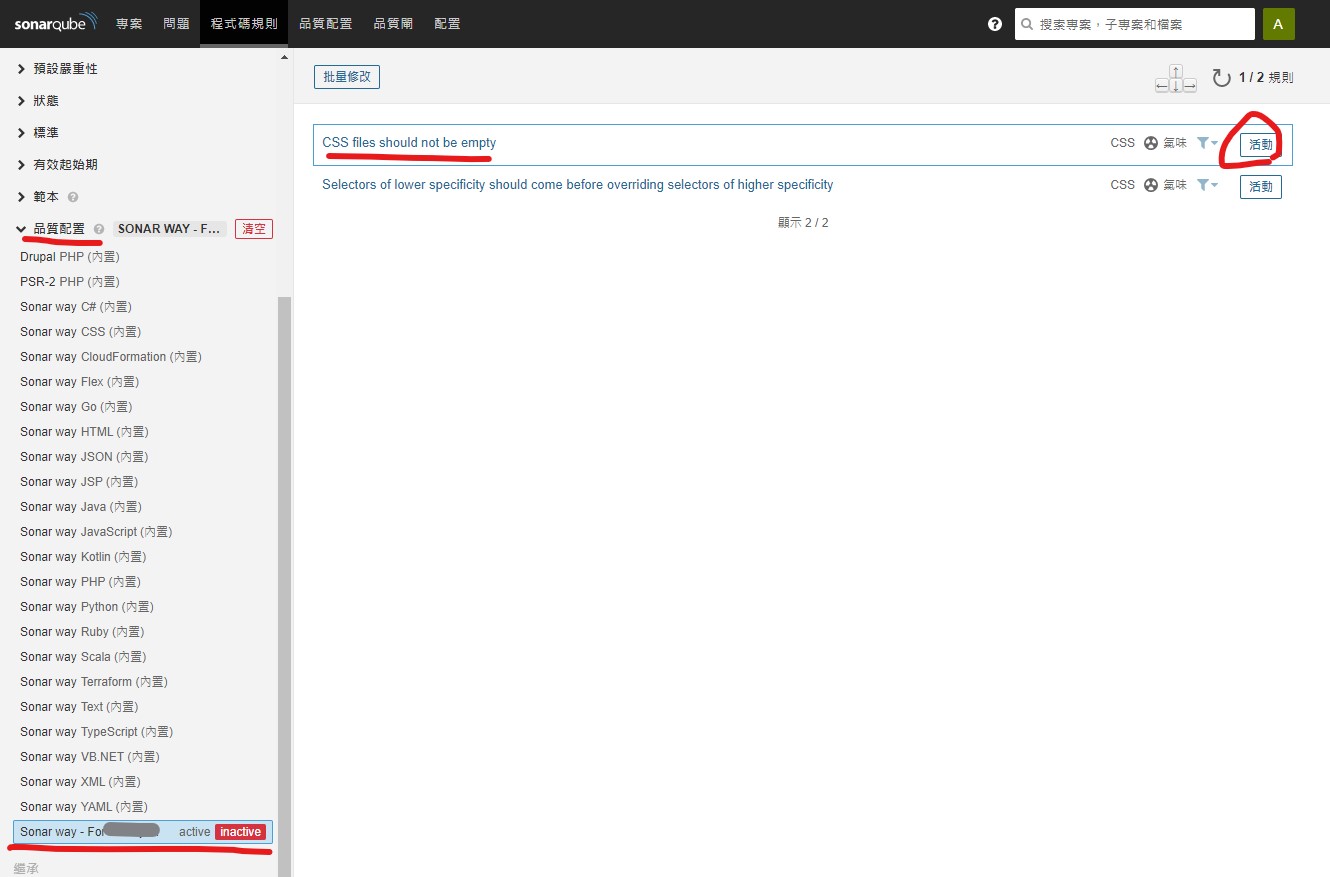
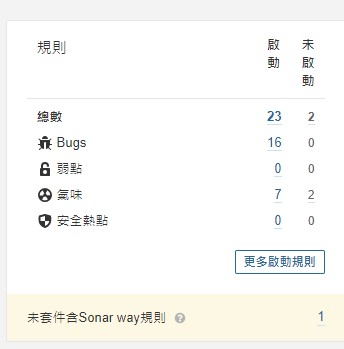
找到特定規則可選擇啟用或停用了
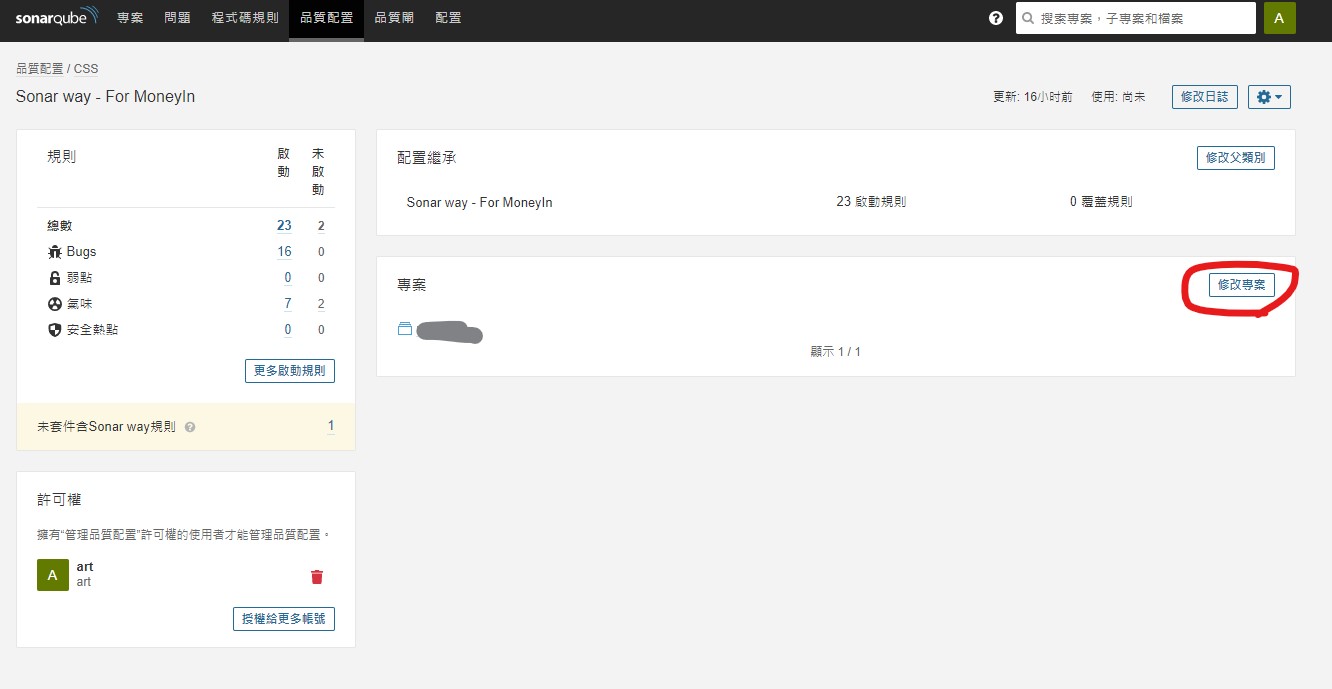
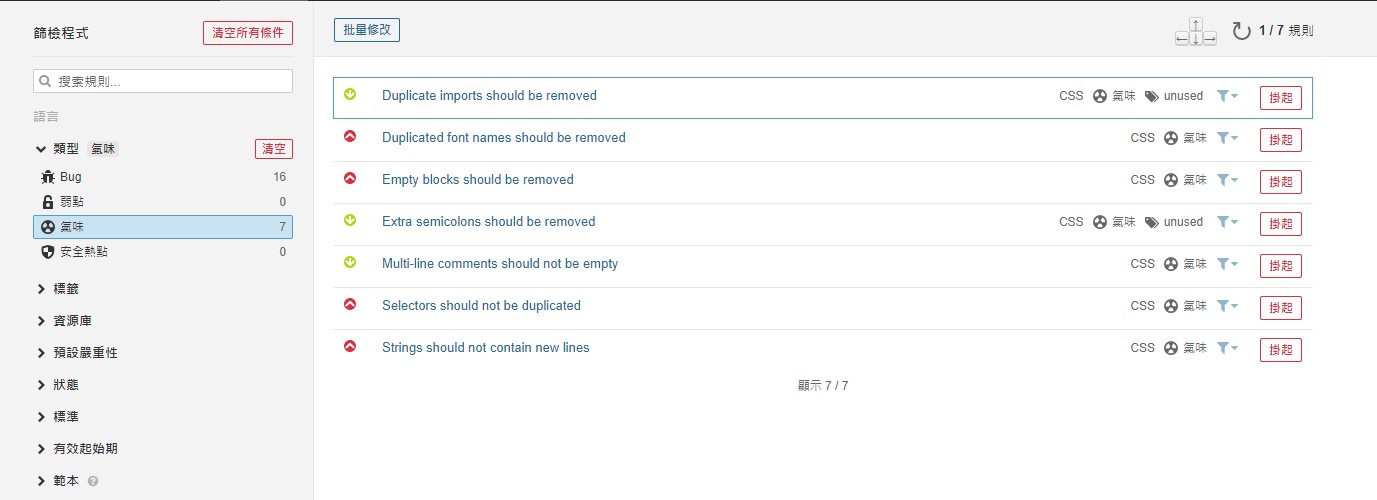
在剛剛的地方點右邊修改專案
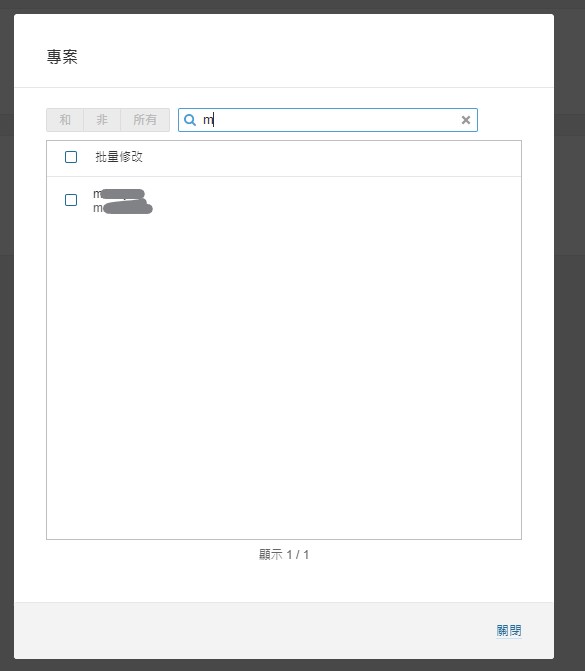
然後輸入你要配置的設定是給哪個專案用的,找到後勾選就行了
最後就是重新跑一次分析就可以了