隔了很久我也忘記要怎麼在 CI 流程中取得 sonarQube 報告並寄送。要用 jenkins 套件也有點懶惰,記得 sonarQube 有提供 API 可以取得各項指標,自己動手做感覺也不難,於是就記錄一下。
注意事項
- 寄送信件透過 email extension template
- 解析 json 字串透過 pipeline utility steps
如果套件有相依性問題記得先處理好,或是尋求其他解決方案
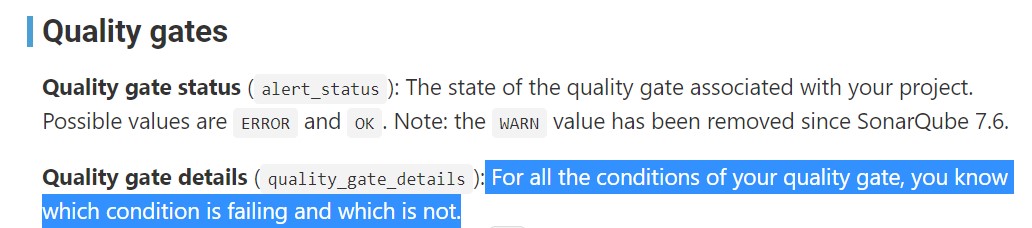
如何判定要不要通知
這邊我的想法是不需要取得很細節的東西,因為我們在 sonarqube 都有設定一個質量閥的東西,如果專案沒有通過我們設置的質量閥,表示有一些東西需要被關心,此時才需要去了解細節,除此之外,只要品質是夠的,也不需要收到通知信件
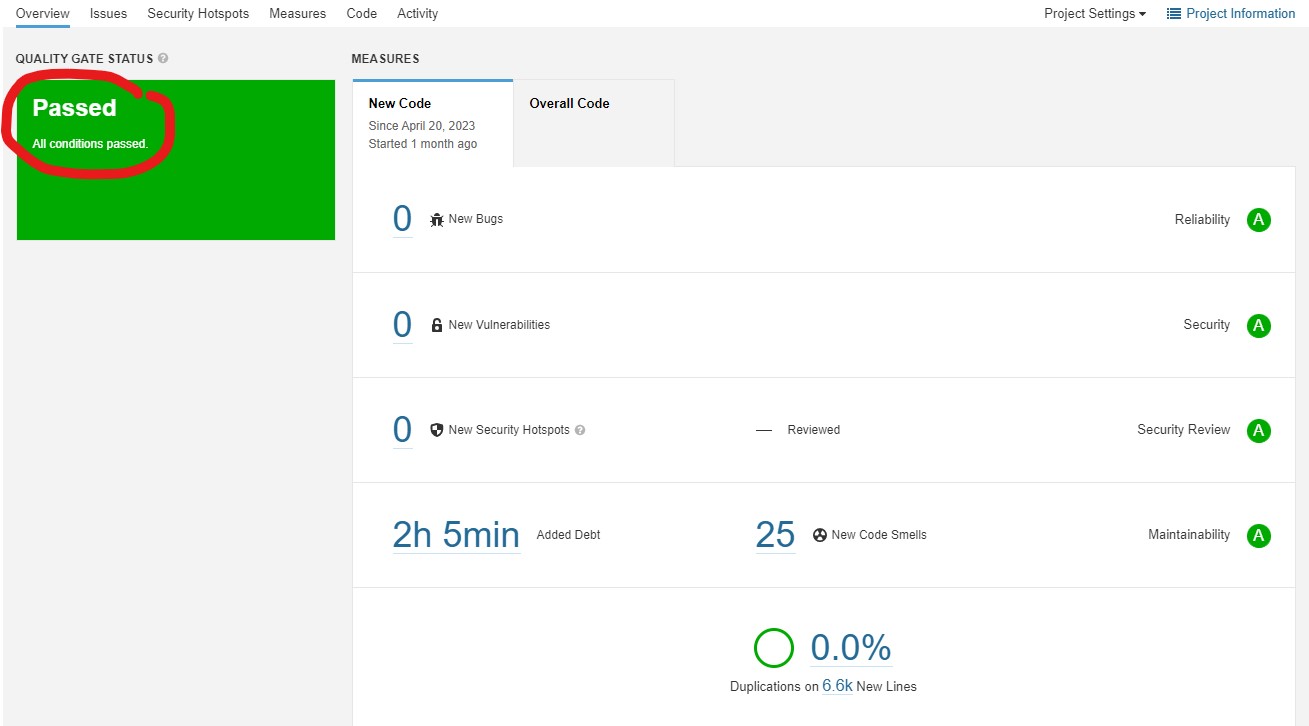
這個就是通過質量閥的顯示,介面上顯示的是很明顯的綠色表示通過
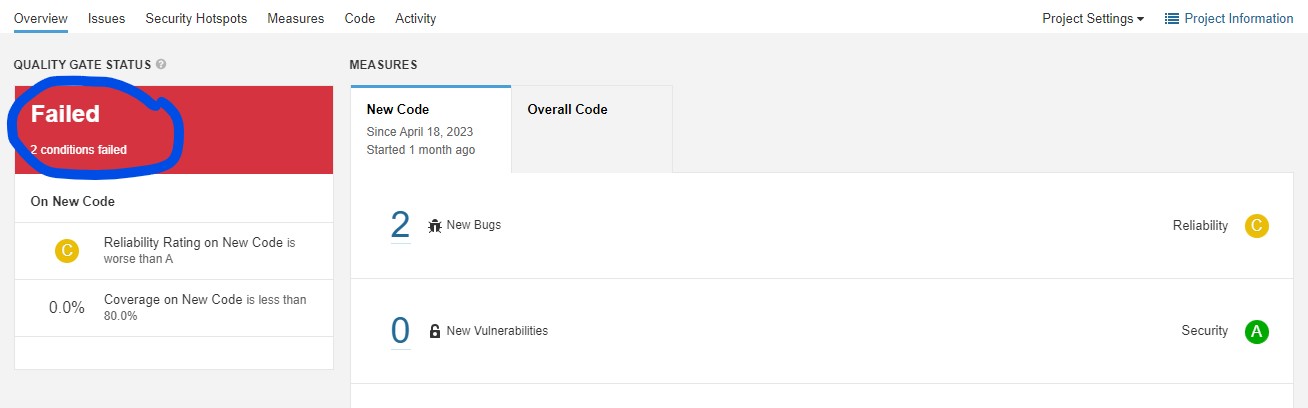
這就是沒有通過的顯示,採用顯眼的紅色並在底下列出了為什麼不 OK 的原因,從網頁上可看到是因為沒有滿足底下的兩個條件才導致質量閥檢查沒有通過,那就順便看看質量閥的設定
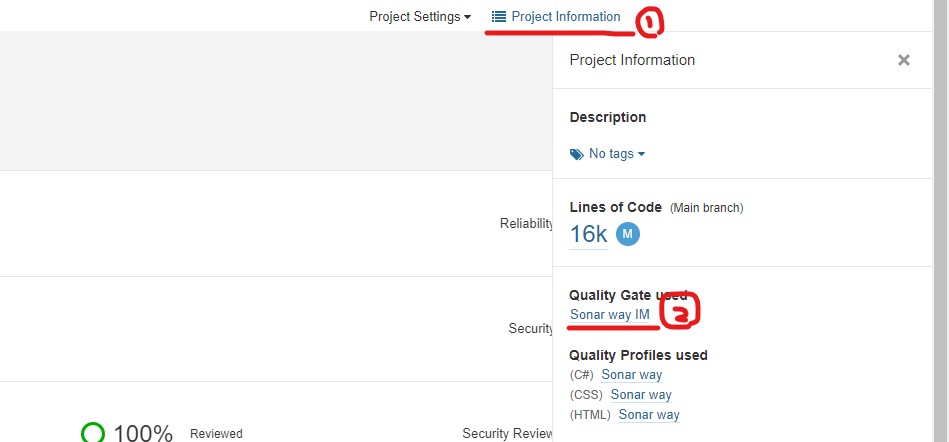
從這邊點一下專案資訊,找到質量閥設定,點一下看明細
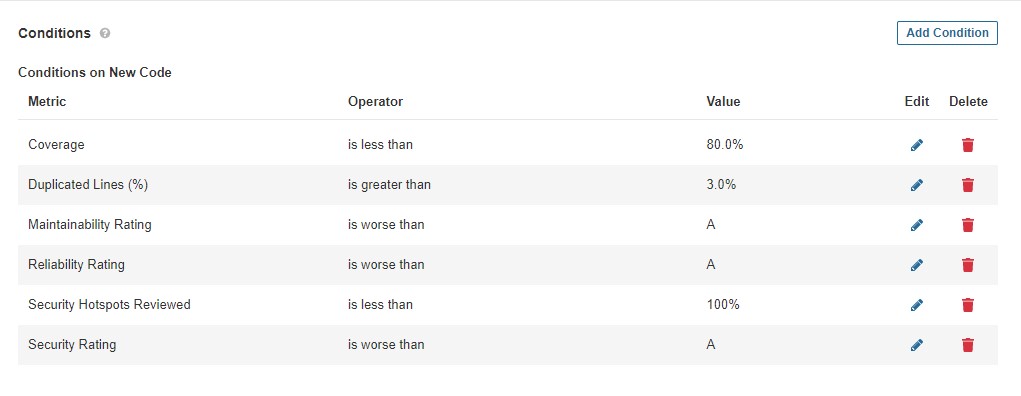
從這裡可以看到細節,呼應先前紅色的質量閥顯示失敗的原因 (當然直接在網頁上點一下紅色質量閥底下的項目,也會直接在網頁上重新導頁到細節)
也就是說,除非是專案分析結果的質量閥紅色了,否則我不需要收到通知信件,如果專案有些小毛病都需要通知,那就依照自己需求調整囉,也就是不依照質量閥,而是取得你想判斷的指標,自行在 CI 流程當中去實作判斷的邏輯,來決定是否要寄送 EMAIL 通知
sonarQube 提供的 API
其實主要也只有一個,那就是給他我們要看的指標 key 然後取得該指標的回應 JSON,CURL 範例如下
curl -u squ_302e77414cbcfd425a22bc0aebb67c7323e39c1e: -X GET "http://localhost:9090/api/measures/component?component=projectKey&metricKeys=alert_status,quality_gate_details"
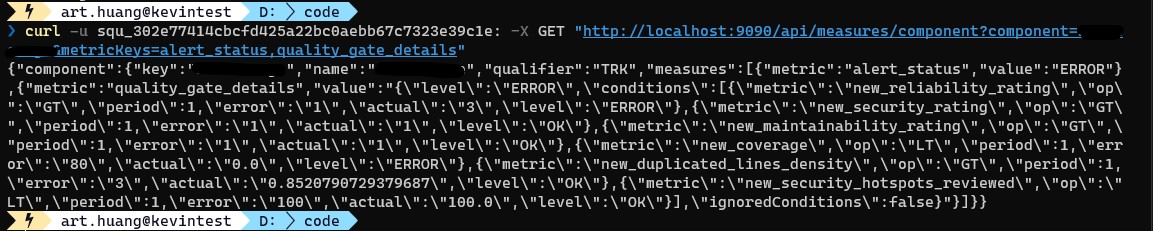
需要注意的是在身分認證的部分,我給予 CURL 指令的是我自己建立的一個 token , 如果要改用 postman 之類的軟體測試,記得要將該 token 進行 base64 編碼,當然專案的 key 也要自行設定喔,這邊我亂打的。
- component: 專案 key
- metricKeys: 指標
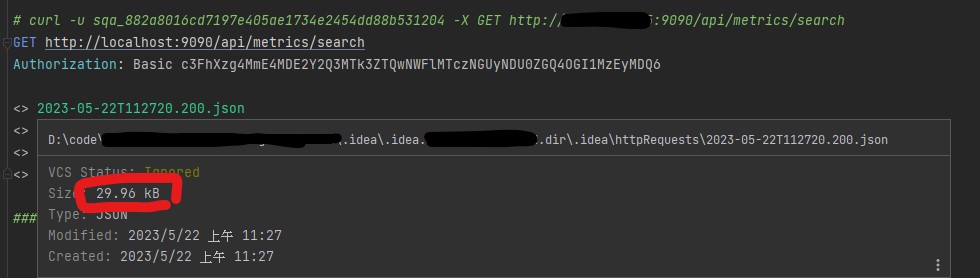
但實際上到底有哪些指標可以用呢?官方有提供另外一個 API 可以查詢,有興趣的人可以去取得內容一個一個看,我是沒有那麼有耐心啦。
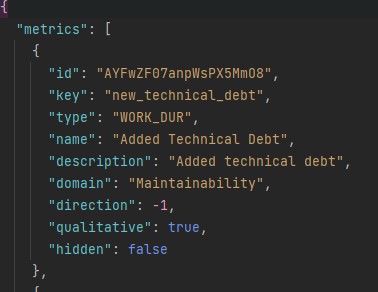
所以我就遵循官方 metric definitions 的部分,直接取得質量閥就好了
最終也就是上面的範例,抓的那兩個指標
因為質量閥的回應結果他是給字串,要自己再把雙引號處理一下
如何在 jenkins 中取得指標內容,寄信
也就是在 CI 的 groovy 裡面透過 CURL 呼叫 sonarQube API 取得資料後,解析 json 內容並組出我們要寫的信件內容,因為後面直接給了完整範例,此處直接講重點就好
- 寫指令包在 script 區段內
- metrics 我還是另外抓了幾個網頁上會顯示的東西,像是壞味道,技術債時間,不想看也可以拿掉,就維持用質量閥(其實是第一版我是全部都寄信,後來才改的質量閥決定是否寄送,懶得改了)
- 用 curl 的 sonarToken 可以直接明碼帶過去會通,不用自己再轉 base64,如果你用的是帳號密碼,就用
-u user pass這樣的格式,不過還是不建議啦,建立個 token 不費力也不要錢,你省這道工幹嘛?是吧
- 這邊解析 json 採用的是土法煉鋼拿索引擷取 json,主因還是 response 內包含了原本送出的 CURL 指令,原因不糾結了,可能是 BAT 還是 CURL 的關係
- json 字串轉物件用的是 readJSON,這樣方便後面取 JSON 資料節點的值,語法請參考範例
- 中間加了一個流程,如果回應的質量閥結果沒問題,我連寄信都不寄了,這邊用 script 包裝 if 語法,用雙等於判斷字串
- 質量閥條件需要先處理雙引號,這邊採用
def detailJson = qualityGateDetails.replace("\\\"", "\"") 簡單好用
- 迴圈取得條件 KEY 與內容,並透過 stringbuilder 組字串,缺點就是他KEY有些沒有很直覺,提供的也是OK不OK,細節還是要再去網站看,不過作為通知應該很夠了
避免暴露敏感資訊
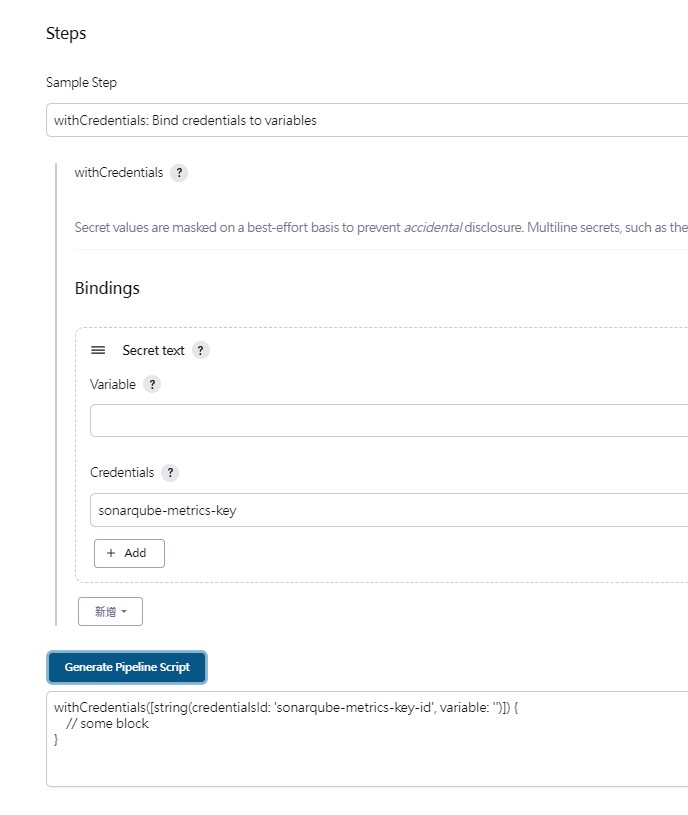
之前的一個版本是直接用字串存放 token 並且用它來組指令,但感覺似乎可以再更安全一點,我不想在建置的時候還要用參數來處理 token,因此可以利用withCredentials來做這件事情
1
2
3
| withCredentials([string(credentialsId: 'sonarqube-metrics-key', variable: 'TOKEN')]) {
curlCmd = "curl -u ${TOKEN}: -X GET \"${sonarUrl}?component=${projectKey}&metricKeys=${metricKeys}\""
}
|
使用上就直接透過pipeline-syntax這個輔助頁面,在這邊直接新增,範例如下
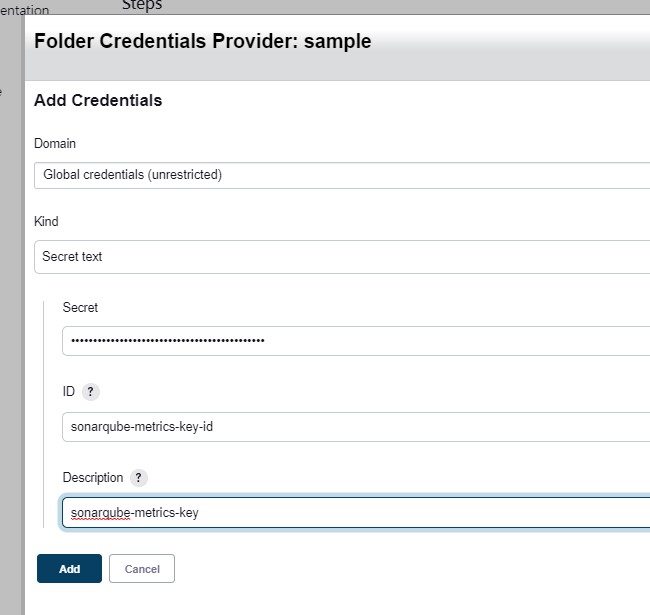
選擇用 secret text,並且設定好 id 跟 desc,這兩個值用途可以看下面使用的時候,選擇下拉選單是吃 desc , 程式碼用的是 id
完整範例
1
2
3
4
5
6
7
8
9
10
11
12
13
14
15
16
17
18
19
20
21
22
23
24
25
26
27
28
29
30
31
32
33
34
35
36
37
38
39
40
41
42
43
44
45
46
47
48
49
50
51
52
53
54
55
56
57
58
59
60
61
62
63
64
65
66
67
68
69
70
71
72
73
74
75
76
77
78
79
80
81
82
83
84
85
86
87
88
89
90
91
92
93
94
95
96
97
98
| pipeline {
agent any
stages {
stage('Get SonarQube Metrics & SendMail') {
steps {
script {
def sonarUrl = "http://localhost:9090/api/measures/component"
def metricKeys = "new_code_smells,new_bugs,new_technical_debt,new_violations,alert_status,quality_gate_details"
def response = ""
def curlCmd = ""
withCredentials([string(credentialsId: 'sonarqube-metrics-key', variable: 'TOKEN')]) {
  curlCmd = "curl -u ${TOKEN}: -X GET \"${sonarUrl}?component=${projectKey}&metricKeys=${metricKeys}\""
}
response = bat(returnStdout: true, script: curlCmd).trim()
def jsonStartIndex = response.indexOf('{')
def jsonResponse = response.substring(jsonStartIndex)
def json = readJSON text: jsonResponse
echo "SonarQube Metrics jsonResponse:"
echo jsonResponse
echo "SonarQube Metrics:"
def newBugsValue = json.component.measures.find { it.metric == 'new_bugs' }?.periods[0]?.value
echo "New Bugs(新錯誤問題的數量): ${newBugsValue}"
def newViolationsValue = json.component.measures.find { it.metric == 'new_violations' }?.periods[0]?.value
echo "New Issues(首次針對新代碼提出的問題數量): ${newViolationsValue}"
def newTechnicalDebtValue = json.component.measures.find { it.metric == 'new_technical_debt' }?.periods[0]?.value
echo "New Technical Debt(修復新代碼上首次出現的所有代碼異味所需的工作量。): ${newTechnicalDebtValue} mins"
def newCodeSmellsValue = json.component.measures.find { it.metric == 'new_code_smells' }?.periods[0]?.value
echo "New Code Smells(新代碼異味問題的總數): ${newCodeSmellsValue}"
def alertStatus = json.component.measures.find { it.metric == 'alert_status' }?.value
echo "Alert Status: ${alertStatus}"
if (alertStatus == 'OK') {
echo 'SonarQube metrics are within acceptable limits. Task terminated.'
} else {
def qualityGateDetails = json.component.measures.find { it.metric == 'quality_gate_details' }?.value
def detailJson = qualityGateDetails.replace("\\\"", "\"")
def sb = new StringBuilder()
sb.append("\n")
def detailObject = readJSON text: detailJson
detailObject.conditions.each { condition ->
def level = condition.level
def currentMetric = condition.metric
sb.append("\t${currentMetric}: ${level}\n")
}
def emailContent =
"""SonarQube Metrics:
Alert Status: ${alertStatus}
Quality Gate Details:${sb.toString()}
Main Metrics:
\tNew Code Smells: ${newCodeSmellsValue}
\tNew Bugs: ${newBugsValue}
\tNew Technical Debt: ${newTechnicalDebtValue}
\tNew Violations: ${newViolationsValue}
See more information about metrics:https://docs.sonarqube.org/latest/user-guide/metric-definitions/
"""
emailext (
subject: '[${projectKey}] SonarQube Metrics Report',
body: emailContent,
to: 'art.huang@local.jenkins',
from: 'art@local.jenkins'
)
}
}
}
}
}
}
|
執行結果
Jenkins 上執行的LOG紀錄
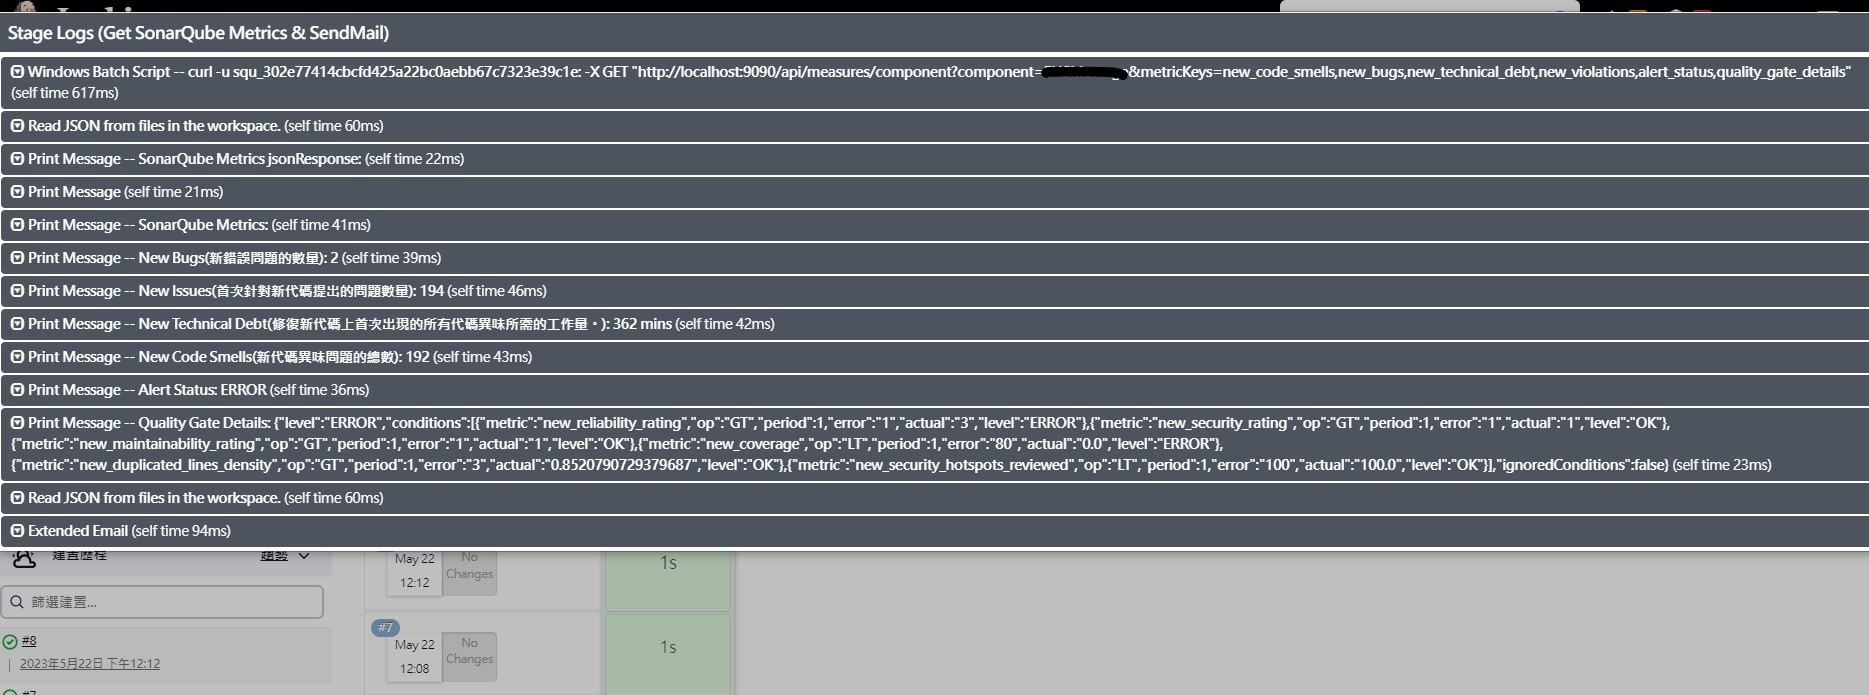
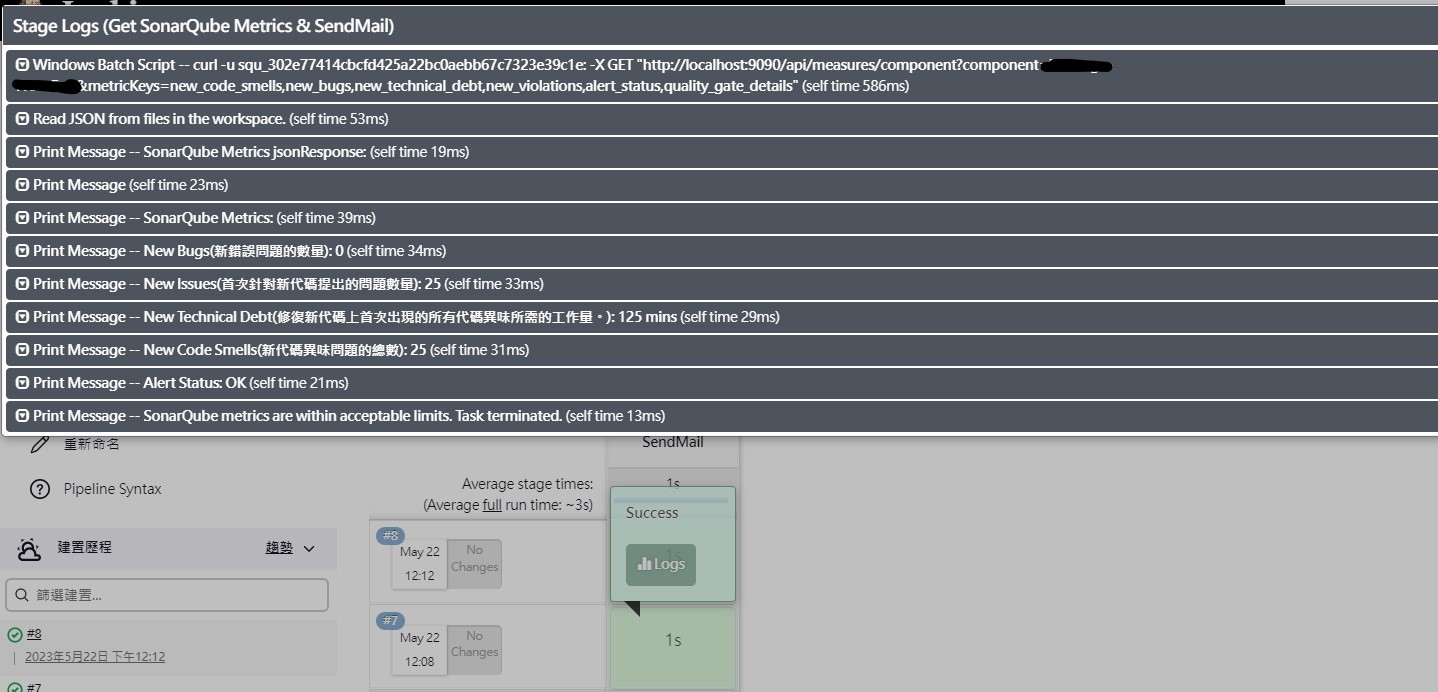
這裡可以看出,當分析結果沒有通過的話,才會寄送信件

結論
我實際上是將這一個任務作為下游任務,並接收專案 projectKey 與 token,這樣可以更方便的串接其他任務,只需要再別的上游任務最後面,加上一個觸發下游任務的步驟即可。有需要進行專案分析的,就先觸發專案分析,分析完成之後再觸發寄信通知,當然怎麼串接就看個人方便,重點也只是將參數傳遞給下游任務,之前有說過,不過為了方便這邊還是再次列出
1
2
3
4
5
6
7
8
9
10
11
12
13
14
15
16
17
18
| stage('Check Should SendMail') {
steps {
script {
def shouldSendMail = params.shouldSendMail
if (shouldSendMail) {
echo "shouldSendMail is true. Trigger next job"
build job: 'Fetch-Metrics-Then-Send-Mail', wait: false, parameters: [
string(name: 'projectKey', value: projectKey),
]
} else {
echo "shouldSendMail is false. Skipping the build step."
}
}
}
}
|
如果你是要在建構任務分析後直接觸發,當然就直接將 projectKey , sonarToken 寫死於步驟內,不需要再用變數;如果是想要做一個共用的任務,就可以用參數來決定,而最一開始的建構任務,就可以將流程 flag 跟必要參數一層層傳遞