本篇記錄透過 CSharp,使用 selenium 進行 e2e 測試的一些心得,因此會比較雜亂,未來可能會、也可能不會再整理
使用 selenium 2 進行 e2e 測試 主要是基於 selenium 2 進行自動化測試;關於 selenium 1、selenium 2,這兩種都可以拿來寫自動化測試;他們的差別最簡單的就是 selenium 1 主要是提供一堆 API 讓你去操作;而 selenium 2 則是提供物件,讓你用物件的方法去撰寫測試。
Selenium WebDriver for Chrome , 過時的作法 先到ChromeDriver - WebDriver for Chrome 下載跟你電腦上版本一樣的 Driver,下載後解壓縮到自訂目錄,最好該目錄有設定進去path環境變數
然後在專案內初始化 webDriver 的時候就可以用
Sample Code for Create ChromeDriver 1 2 3 4 5 6 7 8 string seleniumExePath = ConfigurationManager.AppSettings["SeleniumExePath" ];int waitSec = ConfigurationManager.AppSettings["SeleniumWaitSec" ].ToInt();_driver = new ChromeDriver(ChromeDriverService.CreateDefaultService(seleniumExePath)); _driver.Manage().Window.Maximize(); _driver.Manage().Timeouts().ImplicitWait = TimeSpan.FromSeconds(waitSec);
app.config 1 2 3 4 5 6 <configuration > <appSettings > <add key ="SeleniumWaitSec" value ="20" /> <add key ="SeleniumExePath" value ="c:\Tools" /> </appSettings > </configuration >
關於 Selenium WebDriver for Chrome , 目前的作法 後來才發現原來可以用nuget套件去安裝chromedriver就夠了,且初始化 Driver 的部分也很簡單,所以特別在這邊補充一下,先貼給大家看我目前使用的nuget套件
一切直接都用 nuget 安裝就搞定,不需要在自己下載 exe 執行,方便許多
1 2 3 4 5 6 7 8 9 <?xml version="1.0" encoding="utf-8" ?> <packages > <package id ="DotNetSeleniumExtras.PageObjects" version ="3.11.0" targetFramework ="net452" /> <package id ="DotNetSeleniumExtras.PageObjects.Core" version ="3.12.0" targetFramework ="net452" /> <package id ="DotNetSeleniumExtras.WaitHelpers" version ="3.11.0" targetFramework ="net452" /> <package id ="Selenium.Support" version ="3.141.0" targetFramework ="net452" /> <package id ="Selenium.WebDriver" version ="3.141.0" targetFramework ="net452" /> <package id ="Selenium.WebDriver.ChromeDriver" version ="86.0.4240.2200" targetFramework ="net452" /> </packages >
如此一來,初始化 webDriver 就只需要using OpenQA.Selenium.Chrome;,然後new ChromeDriver();就好了
安裝 nuGet 套件
Selenium.SupportSelenium.WebDriver
第一個套件是因為有用到SelectElement這個類別所以安裝;主要是第二個套件
使用上也很簡單,下面的例子就是一個抓頁面 DOM 然後輸入帳號密碼並送出的範例
1 2 3 Driver.FindElement(By.Id("account" )).SendKeys(account); Driver.FindElement(By.Id("password" )).SendKeys(password); Driver.FindElement(By.Id("submit" )).Click();
語法應該不難理解,細節就請自行查閱 API 語法囉
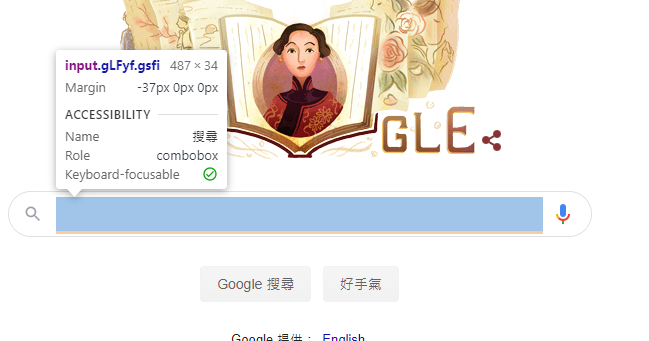
好用的輔助開發工具 XPath Helper 既然是 e2e 測試,選取畫面上的元素是很重要的事情,相信沒有多少人會去自己寫xpath這種東西Ctrl+Shift+C選取畫面上的元素
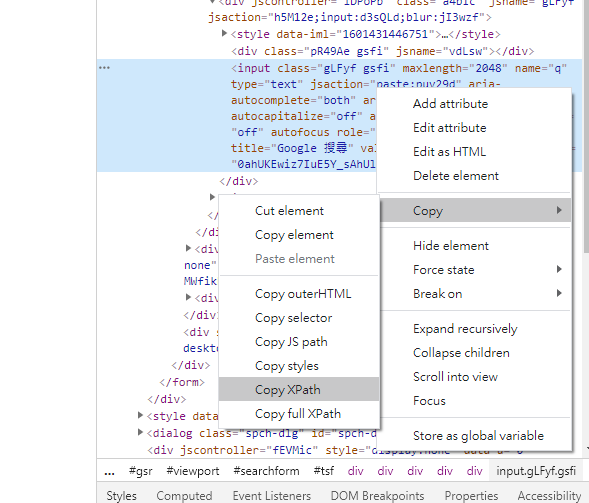
選取後在開發者工具上會反白出來,再將滑鼠移過去,右鍵選擇複製 XPATH
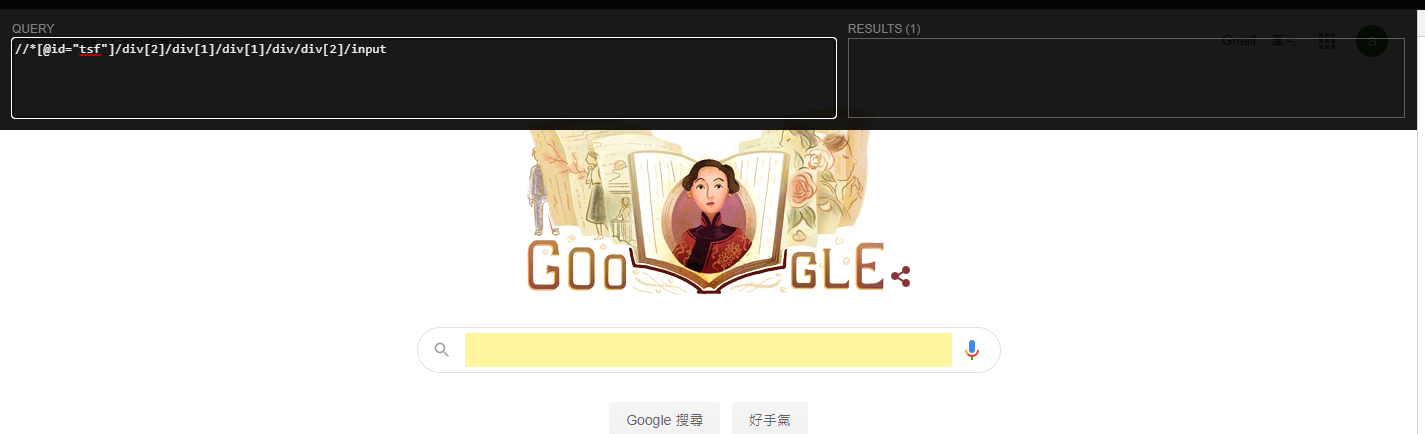
但是,要如何驗證呢?
安裝這一套XPath Helper 就可以了,裝好後點 ICON 會出現一個半透明的輸入框,將 XPATH 於此處貼上,符合的元素在畫面上會顯著的顯示出來
產生單元測試報告 0. 事前準備 設定環境變數 Path,方便在指令列直接打指令,可參考:設定環境變數
執行檔案
實際路徑
msbuild.exe
C:\Program Files (x86)\Microsoft Visual Studio\2019\Community\MSBuild\Current\Bin\MSBuild.exe
vstest.console.exe
C:\Program Files (x86)\Microsoft Visual Studio\2019\Community\Common7\IDE\CommonExtensions\Microsoft\TestWindow\vstest.console.exe
TrxerConsole.exe
自行 下載 後找地方放
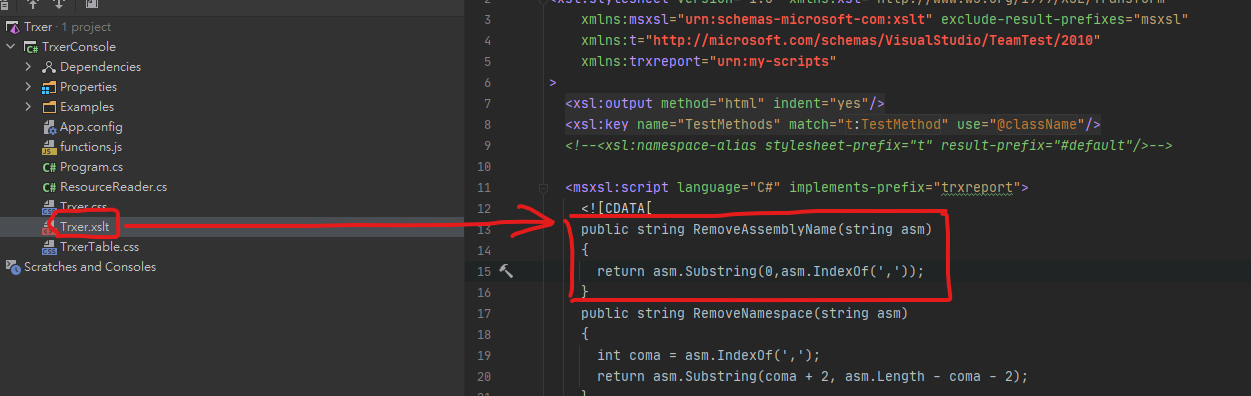
trxerConsole.exe執行若有錯誤,需要下載原始碼自己修改,如下圖的地方,將它替換掉,重新編譯後即可
1 2 3 4 5 6 7 8 public string RemoveAssemblyName (string asm{ if (asm.IndexOf(',' )>0 ) { return asm.Substring(0 ,asm.IndexOf(',' )); } else { return asm; } }
REF:Unhandled Exception: System.ArgumentOutOfRangeException: Length cannot be less than zero
1. 產生 dll 檔案 測試專案先建置,產生測試的 dll 檔案
1 2 3 4 cd D:\code\Github\Repos\SeleniumSpecflow\SeleniumSpecflowmsbuild /p:Configuration=Debug /t:Rebuild SeleniumSpecflow.csproj
2. 產生 trx 報告 使用vstest.console.exe執行測試並產生trx格式的報告檔案,產生路徑在專案根目錄下TestResults的這個子目錄內
1 2 3 4 cd D:\code\Github\Repos\SeleniumSpecflowvstest.console.exe /Logger:trx;LogFileName=e2e.trx "SeleniumSpecflow\bin\Debug\SeleniumSpecflow.dll"
因為希望測試目錄的階層是在專案根目錄下,因此在這個目錄下執行測試,它會自動建立一個子目錄TestResults用來存放測試結果trx檔案
3. 產生 html 報告 使用TrxerConsole.exe將測試報告轉為html格式
1 trxerConsole.exe D:\code\Github\Repos\SeleniumSpecflow\TestResults\e2e.trx
4. 檢視報告內容 透過指令列自動開啟html報告
1 start chrome.exe D:\code\Github\Repos\SeleniumSpecflow\TestResults\E2E.trx.html
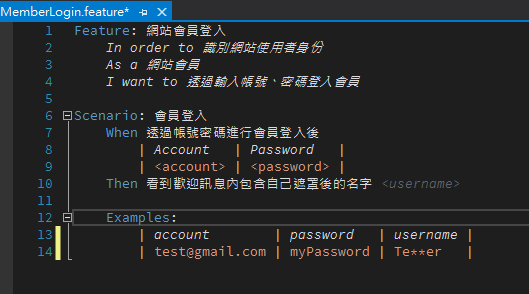
使用 specflow 套件撰寫 BDD 風格的 cucumber 測試文件
像上面這樣的測試案例,是可以直接被執行的,首先需要安裝 VS2019 支援的 SpecFlow 擴充套件,可以從這邊SpecFlow for Visual Studio 2019 下載;另外,在專案內也需要安裝SpecFlow套件,最好是裝新版本;在 IDE 的部分因為在 Rider 內還沒有支援 C# 的 SpecFlow,所以比較友善的開發環境還是在 Visual Studio 2019 之內
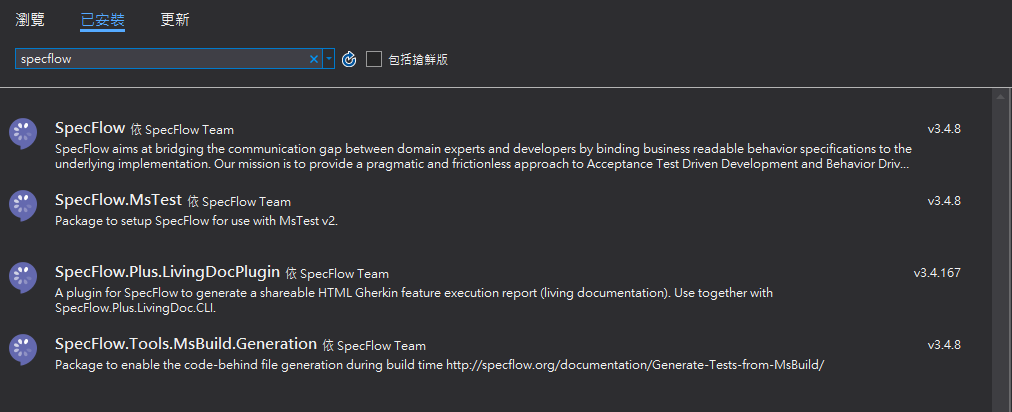
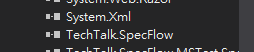
在 VS2019 內若採用MSTEST的測試框架,那麼最好還是安裝一下
SpecFlow.MsTestSpecFlow.Tools.MsBuild.Generation
specFlow 的 Feature 檔其實只是一個純文字的格式,透過套件當你在 Build 的時候,自動產生一個對應的 cs 檔,自動產生出來的檔案不需要加入專案,在測試總管可以看到產生出來的測試案例
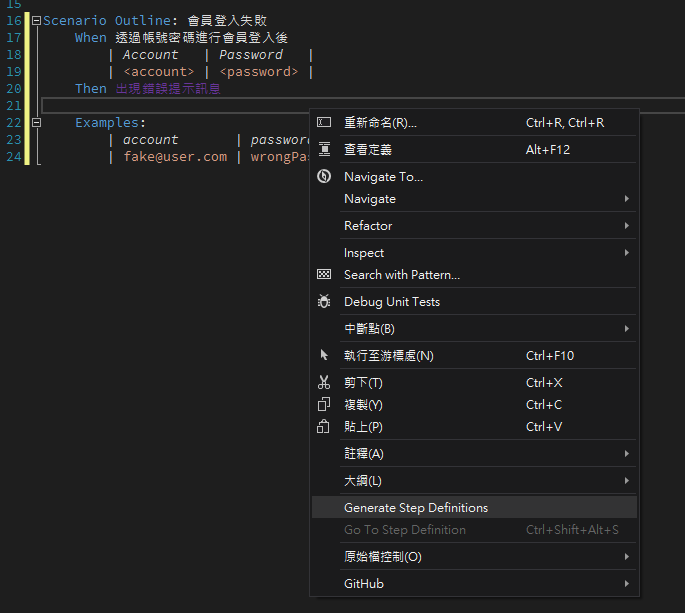
如何開始自動產生步驟定義 feature檔,無法找到定義的部分會以紫色顯示,可以右鍵選單執行Generate Step Definitions
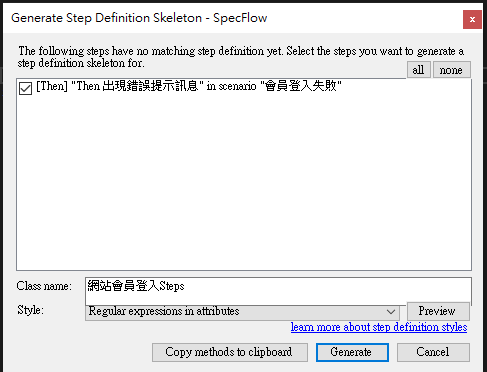
Generate之後會產生一個檔案存放相關的定義,需要你自行選擇儲存位置;若是補足案例的定義,建議是選擇旁邊的複製到剪貼簿,自己找到程式碼的地方貼上修改
如果沒有步驟定義的產生選項可以選,應該就是專案沒有參考到正確的dll檔案
在.netFramework 4.6.1 上面是這個樣子,更高的版本似乎不會在專案目錄下有packages,而是在使用者目錄下面共用,這部分就沒有再去研究
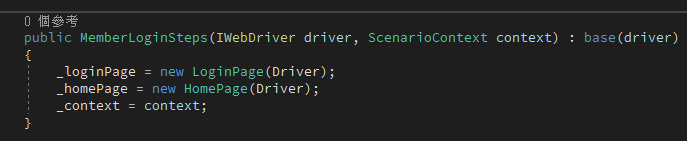
注入 ScenarioContext 使用新版本的SpecFlow需要用注入的方式取得ScenarioContext,但是透過產生的語法是直接給ScenarioContext.Current.Pending()類似這樣的方式。其實就只需要在 Steps 定義檔案的建構式,直接注入ScenarioContext即可
透過 page object model 撰寫測試 我們為頁面新增加一個 model,稱之為 page object,在這個物件內新增一些屬性,讓我們可以直接呼叫使用,而不必每一次都重新抓,當然也可以將一些頁面的操作行為封裝起來,讓我們在使用上更加方便、直觀
安裝這四個 nuget 套件
1 2 3 4 Install-Package DotNetSeleniumExtras Install-Package DotNetSeleniumExtras.PageObjects Install-Package DotNetSeleniumExtras.PageObjects.Core Install-Package DotNetSeleniumExtras.WaitHelpers
在程式內 using 正確的命名空間
1 2 3 using SeleniumExtras.PageObjects;
在物件內就可以這樣宣告,意思是透過 By.Id 的方式去尋找”loginID”,找到的東西放到 TxtAccount 內
1 2 [FindsBy(How = How.Id, Using = "loginID" ) ] public IWebElement TxtAccount { get ; set ; }
當然也可以將 Login 行為封裝在 pageObj 裡面的方法,在這裡會造成頁面切換跳轉的部分,則是返回另外一個pageObj
1 2 3 4 5 6 7 public HomePage Login (string account, string password{ TxtAccount.SendKeys(account); TxtPassword.SendKeys(password); BtnSubmit.Submit(); return new HomePage(); }
但是在使用這樣的方法之前必須要先經過 Init 的步驟,否則所有去抓頁面的東西都會是 null
1 2 3 4 5 6 7 8 9 10 11 12 13 14 15 16 17 18 19 20 21 22 23 24 25 26 27 28 29 30 31 32 33 public static class PropertiesCollection { public static IWebDriver Driver { get ; set ; } } public abstract class PageBase { protected PageBase () { PageFactory.InitElements(PropertiesCollection.Driver, this ); } } public class LoginPage : PageBase { [FindsBy(How = How.Id, Using = "loginID" ) ] public IWebElement TxtAccount { get ; set ; } [FindsBy(How = How.Id, Using = "password" ) ] public IWebElement TxtPassword { get ; set ; } [FindsBy(How = How.Id, Using = "login" ) ] public IWebElement BtnSubmit { get ; set ; } public HomePage Login (string account, string password { TxtAccount.SendKeys(account); TxtPassword.SendKeys(password); BtnSubmit.Submit(); return new HomePage(); } }
而 PropertiesCollection.Driver這個東西則是在 Hook 內測試開始後初始化
1 2 3 4 5 6 [BeforeScenario ] public void Initialize (){ PropertiesCollection.Driver = new ChromeDriver(); }
REF
Selenium C#: Page Object Model Tutorial With Examples Execute Automation - Selenium with C# - Youtube Selenium: PageFactory - Github
產生 cucumber 的測試報告 LivingDoc 專案如果有安裝了SpecFlow.Plus.LivingDocPlugin,會在 Bin 目錄下產生一個測試結果的 json 檔案,所以我們只要透過官方提供的另外一個工具livingdoc.exe,將 json 轉為 Html 報告即可
更新 Specflow 套件至 3.4.3 以上 安裝 SpecFlow.Plus.LivingDoc.CLI SpecFlow.Plus.LivingDoc.CLI需要安裝.NET Core SDK 3.1或更高版本。可以在 Microsoft 官方指南中找到有關設置.NET Core SDK 的信息。雖然產生報告是透過 dotnet core 的工具,但是這個工具只是為了將 json 檔案轉為 html,實際上跟你專案採用.netFramework 或是.net core 無關
1 dotnet tool install --global SpecFlow.Plus.LivingDoc.CLI
REF:Installing the command line tool
在安裝了套件之後,執行測試也會一併產生FeatureData.json供後續產生報告使用,如此一來,就可以直接輸入 livingdoc <Path to FeatureData.json>這樣的指令在執行目錄下產生報告
設定 Visual Studio 2019 外部工具執行產生報告 使用TrxerConsole.exe將測試報告轉為html格式
1 livingdoc D:\code\Github\Repos\SeleniumSpecflow\SeleniumSpecflow\bin\Debug\FeatureData.json
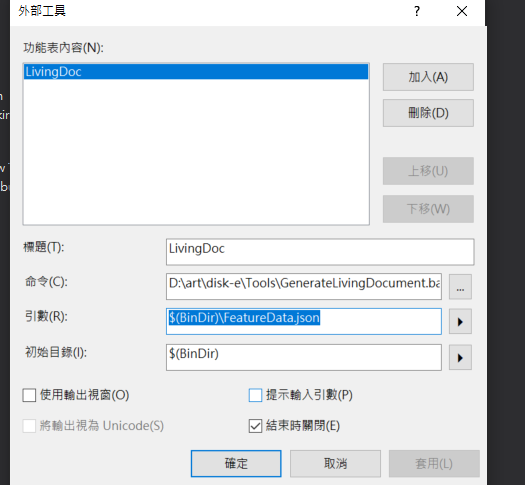
為了方便使用,將產生報告的指令撰寫成批次檔案,存放在某個路徑下,並透過 VS2019 的外部工具去呼叫該批次檔,同時傳入參數
1 2 livingdoc.exe %1 START Chrome LivingDoc.html
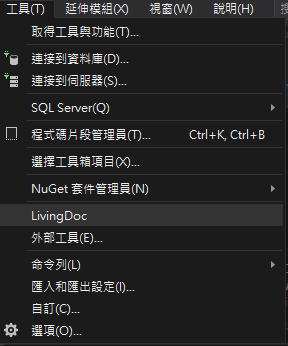
如此一來就可以直接在 Menu 選擇外部工具,並產生報告觀看了
REF:Introducing the SpecFlow+ LivingDoc Generator
ExtentReport 雖然比較好看,但是實際用了之後感覺好像沒有比較好,有興趣的人還是可以自行比較看看,我覺得優點的部分也是缺點,他的報告內容其實是需要自己去建立的,所以喜歡客製的人或許可以塞很多自己要看的內容?不過我沒有那麼勤勞,報告有看到我要看到的指標就好了;另外這個方法需要用到mongoDB,所以再測試的時候也是自己先把它用 docker 建起來;這個報告我沒有花很多時間查,主要是看人家的 sample code 直接抓來用,所以也不會特別說甚麼,直接貼相關 Code 就好了;有興趣的人再自行研究囉
REF:SeleniumWithSpecflow
1 2 3 4 5 6 7 8 9 10 11 12 13 14 15 16 17 18 19 20 21 22 23 24 25 26 27 28 29 30 31 32 33 34 35 36 37 38 39 40 41 42 43 44 45 46 47 48 49 50 51 52 53 54 55 56 57 58 59 60 61 62 63 64 65 66 67 68 69 70 71 72 73 74 75 76 77 78 79 80 81 82 83 84 85 86 87 88 89 90 91 92 93 94 95 96 97 98 99 100 101 102 103 104 105 106 107 108 109 110 111 112 113 114 115 116 117 118 119 120 121 122 123 124 125 126 127 128 129 130 131 132 133 134 135 136 137 138 139 140 141 142 143 144 145 146 147 148 149 150 151 152 153 154 155 156 157 158 159 160 161 162 163 164 using System;using System.Configuration;using System.Globalization;using System.IO;using AventStack.ExtentReports;using AventStack.ExtentReports.Gherkin.Model;using AventStack.ExtentReports.Reporter;using BoDi;using OpenQA.Selenium;using OpenQA.Selenium.Chrome;using OpenQA.Selenium.Remote;using TechTalk.SpecFlow;namespace SeleniumSpecflow { [Binding ] public class Hooks { private static ExtentTest _featureName; private static ExtentTest _scenario; private static ExtentReports _extent; private static KlovReporter _klov; private RemoteWebDriver _driver; private readonly IObjectContainer _objectContainer; public Hooks (IObjectContainer objectContainer ) { _objectContainer = objectContainer; } [BeforeTestRun ] public static void InitializeReport () { string reportPath = GetReportPath(); var htmlReporter = new ExtentHtmlReporter(reportPath); htmlReporter.Configuration().Theme = AventStack.ExtentReports.Reporter.Configuration.Theme.Dark; _extent = new ExtentReports(); _klov = new KlovReporter(); _klov.InitMongoDbConnection("localhost" , 27017 ); _klov.ProjectName = "ExecuteAutomation Test" ; _klov.KlovUrl = "http://localhost:5689" ; _klov.ReportName = "Karthik KK" + DateTime.Now.ToString(CultureInfo.InvariantCulture); _extent.AttachReporter(htmlReporter, _klov); } private static string GetReportPath () { string binDir = Directory.GetCurrentDirectory(); string projectDirectory = Directory.GetParent(binDir).Parent?.Parent?.FullName; return Path.Combine(projectDirectory, "ExtentReport.html" ); } [AfterTestRun ] public static void TearDownReport () { _extent.Flush(); } [BeforeFeature ] public static void BeforeFeature (FeatureContext featureContext ) { _featureName = _extent.CreateTest<Feature>(featureContext.FeatureInfo.Title); } [AfterStep ] public void InsertReportingSteps (ScenarioContext context ) { if (context.ScenarioExecutionStatus == ScenarioExecutionStatus.StepDefinitionPending) { switch (context.CurrentScenarioBlock) { case ScenarioBlock.Given: _scenario.CreateNode<Given>(ScenarioStepContext.Current.StepInfo.Text).Skip("Step Definition Pending" ); break ; case ScenarioBlock.When: _scenario.CreateNode<When>(ScenarioStepContext.Current.StepInfo.Text).Skip("Step Definition Pending" ); break ; case ScenarioBlock.Then: _scenario.CreateNode<Then>(ScenarioStepContext.Current.StepInfo.Text).Skip("Step Definition Pending" ); break ; } return ; } if (context.TestError == null ) { switch (context.CurrentScenarioBlock) { case ScenarioBlock.None: break ; case ScenarioBlock.Given: _scenario.CreateNode<Given>(ScenarioStepContext.Current.StepInfo.Text); break ; case ScenarioBlock.When: _scenario.CreateNode<When>(ScenarioStepContext.Current.StepInfo.Text); break ; case ScenarioBlock.Then: _scenario.CreateNode<Then>(ScenarioStepContext.Current.StepInfo.Text); break ; } return ; } switch (context.CurrentScenarioBlock) { case ScenarioBlock.Given: _scenario.CreateNode<Given>(ScenarioStepContext.Current.StepInfo.Text).Fail(context.TestError.InnerException); break ; case ScenarioBlock.When: _scenario.CreateNode<When>(ScenarioStepContext.Current.StepInfo.Text).Fail(context.TestError.InnerException); break ; case ScenarioBlock.Then: _scenario.CreateNode<Then>(ScenarioStepContext.Current.StepInfo.Text).Fail(context.TestError.Message); break ; } } [BeforeScenario(Order = 0) ] public void Initialize (ScenarioContext context ) { InitBrowser(); _scenario = _featureName.CreateNode<Scenario>(context.ScenarioInfo.Title); } [AfterScenario(Order = 1000) ] public void CleanUp () { _driver.Quit(); } internal void InitBrowser () { string seleniumExePath = ConfigurationManager.AppSettings["SeleniumExePath" ]; int waitSec = ConfigurationManager.AppSettings["SeleniumWaitSec" ]; _driver = new ChromeDriver(ChromeDriverService.CreateDefaultService(seleniumExePath)); _driver.Manage().Window.Maximize(); _driver.Manage().Timeouts().ImplicitWait = TimeSpan.FromSeconds(waitSec); _objectContainer.RegisterInstanceAs<IWebDriver>(_driver); } } }
SpecRun Report 更新到 SpecFlow + Runner
Remove the SpecFlow.MsTest NuGet package from your project
Add the SpecRun.SpecFlow NuGet package to your project
Build your project
REF:Migration to SpecFlow+ Runner
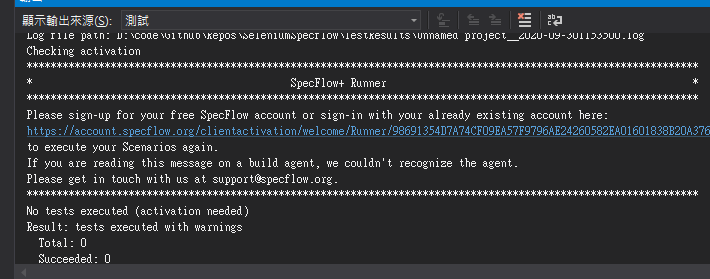
做完上面的步驟你在 IDE 裏面是看不到任何測試的,也不知道怎麼一回事,後來到【輸出】視窗去看才知道必須要先註冊免費的帳號
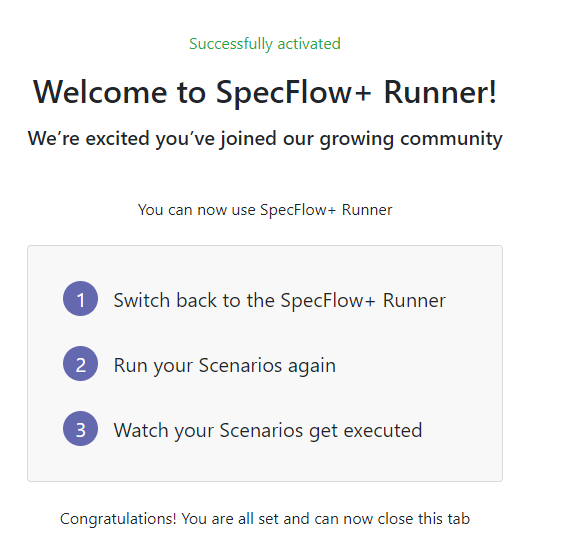
點連結,透過 Microsoft 登入並註冊 specflow 帳號,完畢之後會說可以用了
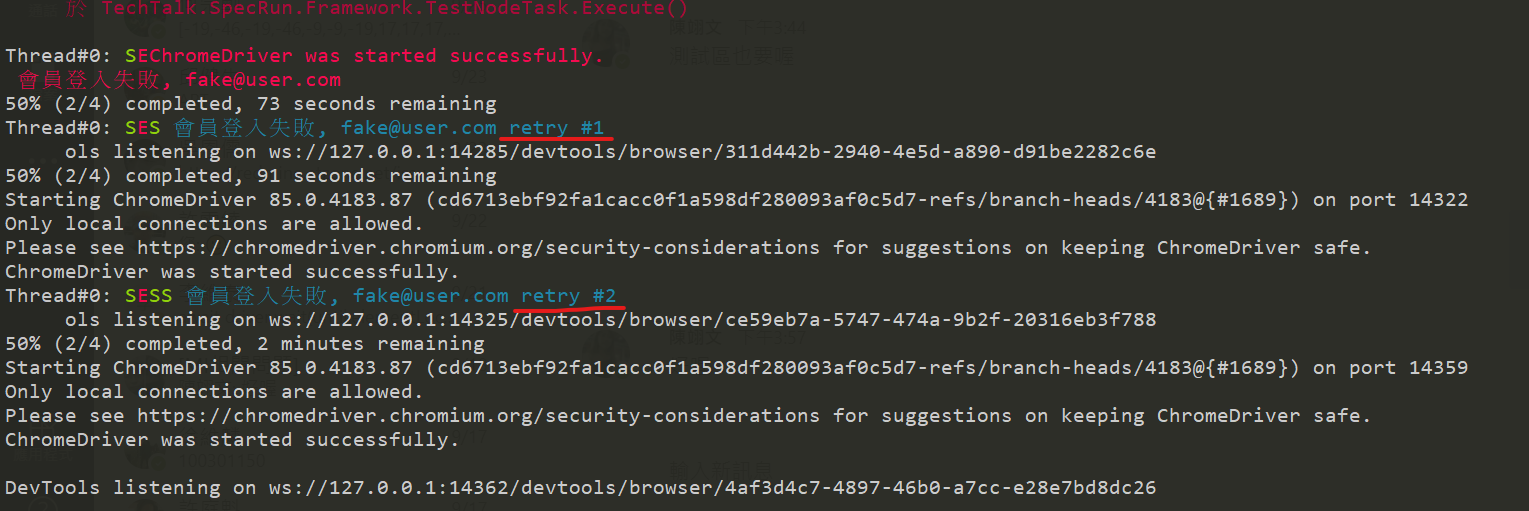
不得不提,他的報告真的很醜,但是資訊跟功能著實讓我驚豔,原本的測試失敗了就是失敗了,我需要手動執行,但是他居然會失敗後幫你 retry
做完這些動作後我的測試總管似乎壞掉了,經由 StackOverFlow 的這篇討論 ,我想嘗試照著做,發現沒有該暫存目錄,最後我關閉 VS2019 所有實體後,重新開啟專案,重新建置後順利看到所有測試案例
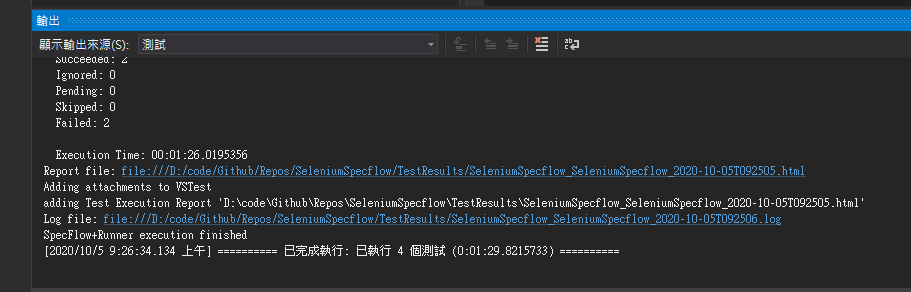
它會在專案的目錄下建立一個runtests.cmd,需要測試的時候直接跑這個 command 就可以了,報告會在跑完測試的時候一併產生,連結可以從 VS2019 的輸出視窗看到,直接點擊就可以看到
如何設定測試 參閱官方網站的說明 ,在使用 SpecFlow + Runner version 3.0.284 以後的版本,預設如下
Search for tests in the base folder (i.e. bin/Debug or bin/Debug/<Framework>) when using SpecRun.exe for test execution
Execution configuration element:
testThreadCount is 1
stopAfterFailures is 3
testSchedulingMode is Sequential
如果要變更設定,需要新增.srprofile設定檔進行設置
自行編輯報告 Template 請參閱官方的Tutorial: Customizing Reports 文件
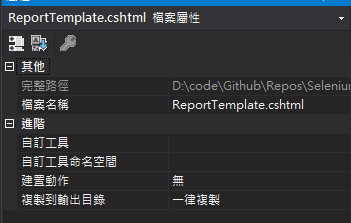
要使用自訂的 Template,必須要先將報告的 template cshtml 文件,從 nuget 目錄下面 copy 到專案目錄並加入專案,然後在專案的屬性視窗,選擇一律複製
接著依照官網的建議設定,如果只需要產一份報告的,就利用Setting 提到的reportTemplate;如果要產多份報告的,就利用Report 裡面的Template標籤,文件內都有範例可參考