之前的專案採用ASP.NET MVC5的方式建立,當時沒有採用webpack編譯前端程式碼,使用的方式是透過script tag 載入vue.js使用,在 component 的部分則是利用字串模板的方式,以Vue.component()的方式全域註冊,嘗試透過webpack將前端程式編譯,並改用 single file component 的方式撰寫 vue 元件
目錄架構
| 目錄 |
版控 |
加入專案 |
備註 |
說明 |
/Scripts/Page/**/*.js |
Y |
Y |
global |
放置各個頁面的主要 js 程式 |
/Source/Page/**/*.js |
Y |
N |
ESModule |
同上,但是是 ESModule 版本 |
/Source/Component/**/*.vue |
Y |
N |
ESModule |
各功能所用到的 Vue Single File Component |
/Source/Enums/**.js |
Y |
N |
ESModule |
放置相關的列舉 |
/Views/Bundle/Page/**/*.cshtml |
Y |
Y |
webpack 產出 |
用來取代cshtml檔案內的 script 標籤 |
/Views/BundleTemp/_Js_Bundle.cshtml |
Y |
N |
ejs |
產生partial view的template檔案 |
改寫原有功能的步驟,以首頁/Home/Index的範例來解說,流程大概就是
/Views/Home/Index.cshtml:將後端 Bundle 的 script 移除,替換為@Html.Partial("~/Views/Bundle/Page/Home/Index_Js.cshtml")/Scripts/Page/Home/Index.js:將檔案複製到/Source/Page/Home/Index.js,並針對內容改寫為ESModule寫法,用到的外部檔案比照辦理,複製後改寫- 將用到的
Vue Component改寫為SFC,並放置於/Source/Component目錄下,依照元件功能分類
- 移除
BundleConfig.cs未使用的 bundle 設定
webpack.common.js:修改進入點 pattern:Source/Page/{Home}/*.js,代表會抓/Source/Page/Home/*.js作為 entry
安裝相關套件
直接列出package.json依賴套件,直接看比較快,需要注意的是vue的版本需要與vue-template-compiler一致,因為之前的文章用的是webpack@3 + html-webpack-plugin@3.2.0,已經有點久了,現在都到webpack5了,所以重新更新了一下內容
- HMR 指令不用再呼叫
webpack-dev-server,直接用webpack serve呼叫
- 因為用了
webpack5,所以 html-webpack-plugin也要重新調整template的 ejs 語法
1
2
3
4
5
6
7
8
9
10
11
12
13
14
15
16
17
18
19
20
21
22
23
24
25
26
27
28
29
30
31
32
33
34
35
36
37
38
|
{
"scripts": {
"start": "webpack serve --config webpack.dev.js",
"watch": "webpack --config webpack.dev.js --watch",
"build:prod": "webpack --config webpack.prod.js",
"build:dev": "webpack --config webpack.dev.js"
},
"keywords": [],
"author": "",
"license": "ISC",
"devDependencies": {
"@babel/core": "^7.13.10",
"babel-eslint": "^10.1.0",
"babel-loader": "^8.2.2",
"clean-webpack-plugin": "^3.0.0",
"css-loader": "^5.1.1",
"eslint": "^7.21.0",
"eslint-plugin-vue": "^7.7.0",
"glob": "^7.1.6",
"html-webpack-plugin": "^5.3.1",
"less-loader": "^8.0.0",
"sass-loader": "^11.0.1",
"style-loader": "^2.0.0",
"terser-webpack-plugin": "^5.1.1",
"url-loader": "^4.1.1",
"vue-hot-reload-api": "^2.3.4",
"vue-loader": "^15.9.6",
"vue-template-compiler": "^2.5.22",
"webpack": "^5.24.4",
"webpack-cli": "^4.5.0",
"webpack-dev-server": "^3.11.2",
"webpack-merge": "^5.7.3"
},
"dependencies": {
"vue": "^2.5.22"
}
}
|
webpack 設定
因為希望編譯的時候可以選擇開發環境或是正式環境,參考官網採用webpack-merge的方式,並透過指令列給予設定檔參數,藉此決定執行哪一份設定;具體的步驟是將設定區分為共用(webpack.common.js)、開發環境(webpack.dev.js)、正式環境(webpack.prod.js),細節請直接參考設定檔案內容。
因為是 ASP.NET MVC 專案,前提條件是將進入點 js 檔案的路徑,都是這個 pattern:/Scripts/Page/{Controller}/{Action}.js,取得進入點的部分為了可以漸進的調整各個頁面,因此採用 glob 的方式去產生進入點的 js 路徑,透過getEntry()將每一隻程式的進入點變成一對 key-value-pair,這樣也可以在隨後的output設定處,利用[name].js的方式輸出檔名;配合 output.path 的設定,將輸出目錄定義在Dist路徑下,所以在.cshtml頁面裡面,載入的 Pattern 也會是Dist/Page/{Controller}/{Action}.js
webpack.common.js
1
2
3
4
5
6
7
8
9
10
11
12
13
14
15
16
17
18
19
20
21
22
23
24
25
26
27
28
29
30
31
32
33
34
35
36
37
38
39
40
41
42
43
44
45
46
47
48
|
const HtmlWebpackPlugin = require('html-webpack-plugin');
const VueLoaderPlugin = require('vue-loader/lib/plugin');
const path = require('path');
const glob = require('glob');
const getEntryFiles = () => glob.sync(path.join(__dirname, 'Source/Page/{Home}/*.js'));
const getEntry = function () {
let Entries = {};
getEntryFiles().forEach(function (f) {
let bundleName = /.*\/(Page\/.*?)\.js/.exec(f)[1];
Entries[bundleName] ? Entries[bundleName].push(f) : (Entries[bundleName] = [f]);
});
return Entries;
};
let CommonConfig = {
entry: getEntry(),
output: {
path: path.join(__dirname, 'Dist'),
filename: '[name].js',
clean: true,
publicPath: '/Dist'
},
module: {
rules: [
{test: /\.js$/, use: 'babel-loader', exclude: /node_modules/},
{test: /\.vue$/, use: 'vue-loader'},
{test: /\.css$/, use: ['style-loader', 'css-loader']}, =
{test: /\.less$/, use: ['style-loader', 'css-loader', 'less-loader']},
{test: /\.scss$/, use: ['style-loader', 'css-loader', 'sass-loader']},
{test: /\.(jpg|png|gif|bmp|jpeg)$/, use: 'url-loader?limit=8000'},
{test: /\.(tff|eot|svg|woff|woff2)$/, use: 'url-loader'},
],
},
resolve: {
alias: {
vue: 'vue/dist/vue.js',
},
extensions: ['.js', '.vue'],
},
plugins: [
new VueLoaderPlugin()
],
};
module.exports = CommonConfig
|
webpack.dev.js
開發環境設定主要多了devServer區段的設定,可以參考开发服务器(DevServer)
1
2
3
4
5
6
7
8
9
10
11
12
13
14
15
16
17
18
19
20
| const { merge } = require("webpack-merge");
const common = require("./webpack.common.js");
module.exports = merge(common, {
mode: "development",
devtool: "inline-source-map",
target: "web",
devServer: {
hot: true,
inline: true,
port: 8888,
open: true,
proxy: [
{
context: () => true,
target: "http://localhost:8898",
},
],
},
});
|
webpack.prod.js
正式環境設定相對地較為簡單,主要多了一個輸出目錄清空的動作,至於套件terser-webpack-plugin,則是為了production的時候,不要產生版權的文字檔
1
2
3
4
5
6
7
8
9
10
11
12
13
14
15
16
17
18
19
20
21
22
23
24
25
26
27
28
|
const { merge } = require("webpack-merge");
const { CleanWebpackPlugin } = require("clean-webpack-plugin");
const TerserPlugin = require("terser-webpack-plugin");
const common = require("./webpack.common.js");
module.exports = merge(common, {
mode: "production",
plugins: [
new CleanWebpackPlugin({
cleanAfterEveryBuildPatterns: ["Dist"],
verbose: true,
}),
],
optimization: {
minimize: true,
minimizer: [
new TerserPlugin({
terserOptions: {
format: {
comments: false,
},
},
extractComments: false,
}),
],
},
});
|
範例頁面
CSHTML
範例頁面原本採用script標籤載入其他的第三方套件,還有自己撰寫的 js 程式,原本的第三方程式碼一樣用 script 載入,自己撰寫的程式改用webpack打包,包含.vue file
1
2
3
4
5
6
7
8
9
10
11
| <div id="app">
<my-list></my-list>
</div>
@section scripts{
<script src="~/Scripts/Plugins/ckeditor5/build/ckeditor.js"></script>
<script src="~/Scripts/Plugins/CKEditor/ckeditor.js"></script>
<script src="~/Scripts/Plugins/Vue-Table-2/vue-tables-2.min.js"></script>
@Html.Partial("~/Views/Bundle/Page/Home/Index_Js.cshtml") }
|
js
這裡的目錄結構可以自己定義好,也有人會用webpack設定裡面的resolve.alias區段去 mapping 實際的路徑,像是下面這樣在webpack設定
1
2
3
4
5
6
7
8
9
10
11
| {
resolve: {
alias:{
'@Enums': path.join(__dirname,'Source/Enums'),
'@Page': path.join(__dirname,'Source/Page'),
},
extensions: ['.js', '.vue'],
},
}
|
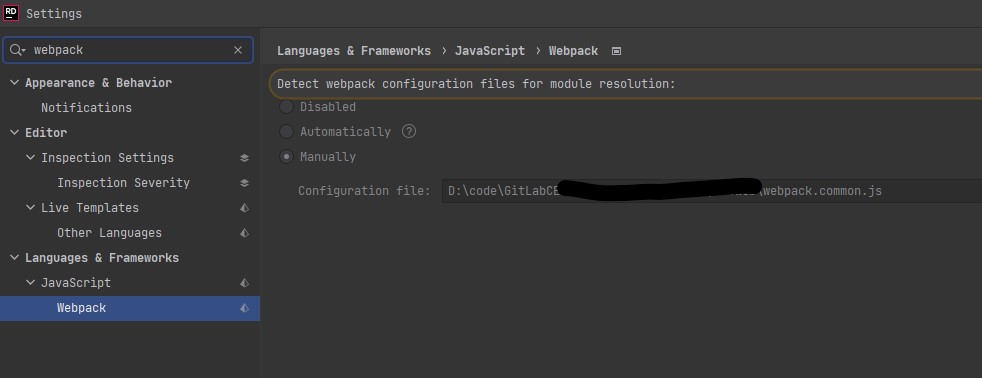
而要讓Rider支援,只要指定好設定檔案就好
下面的則是進入點的範例程式碼
1
2
3
4
5
6
7
8
9
10
11
12
13
14
|
import Vue from "vue";
import MyList from "../../Component/MyList";
Vue.use(CKEditor);
Vue.use(VueTables.ServerTable);
new Vue({
el: "#app",
components: {
"my-list": MyList,
},
});
|
另外要注意的是,如果要讓jest也看的懂alias,也需要另外在jest的設定或package.json內設定相關路由
1
2
3
4
5
6
7
8
9
10
11
12
13
14
15
16
17
|
{
"jest": {
"testResultsProcessor": "jest-junit",
"moduleNameMapper": {
"^@Enums(.*)$": "<rootDir>/Source/Enums$1",
"^@Page(.*)$": "<rootDir>/Source/Page$1"
},
"moduleFileExtensions": ["js", "vue"],
"transform": {
".*\\.(vue)$": "vue-jest",
".*\\.(js)$": "babel-jest"
}
}
}
|
split Chunks
所有的程式都打包在同一個檔案,無疑會造成一個大檔案,為了網頁速度通常會將這些東西切割出來,通常會將自己寫的東西包一包,引用的套件切出來,下列的設定會將 vue 都打包,放在Dist/libs/vue.js內,所以記得也要在有用到的cshtml頁面載入
1
2
3
4
5
6
7
8
9
10
11
12
13
14
15
16
17
18
19
20
21
22
23
24
25
26
|
{
output: {
path: path.join(__dirname, 'Dist'),
filename: '[name].js',
clean: true,
publicPath: '/Dist'
},
optimization: {
splitChunks: {
cacheGroups: {
vue: {
name: 'libs/vue',
test: module => /vue/.test(module.context),
chunks: 'initial',
priority: 10
},
vendors: {
name: 'libs/all',
test: /[\\/]node_modules[\\/]/,
priority: -10,
},
}
}
}
}
|
重複的 vendors
實際運作後,發現在打包出來的檔案內,包含了重複的vue.js,一開始我以為是版本不一樣的關係,vueTables 依賴2.6.12,我使用的是2.5.22,所以調整package.json到2.6.12,再編譯一次仍舊重複打包。最終我透過一個工具網頁:inspectpack上面的解決方案Fixing bundle duplicates,改用yarn管理專案,並且加入package.json的設定,接著再透過指令yarn build:dev,打包的結果就沒有重複了
後來又重複測試了幾次,似乎用哪一套管理工具並沒有差別,重點只是在node_modules目錄底下是否為扁平化或是傳統的樹狀結構,只要是扁平化的我自己測試用npm或是yarn都可以
動態注入 js 給 cshtml
webpack 編譯的時候,自動產生相關片段,並且在 cshtml 當中直接引用,如下
1
| @section scripts{ @Html.Partial("~/Views/Bundle/Page/Home/Index_Js.cshtml") }
|
因此我們需要讓 webpack 依據 entry 自動產生相關檔案,透過HtmlWebpackPlugin套件,給予一個template讓他自動產生 partial view
1
2
3
4
5
6
7
8
9
10
11
12
13
14
15
16
| const setHtmlTemplates = function (entryFiles) {
entryFiles.forEach((filePath) => {
let path = /.*\/(Source\/Page\/.*?)\.js/.exec(filePath)[1];
let BundleName = path.split("/").splice(1).join("/");
CommonConfig.plugins.push(
new HtmlWebpackPlugin({
template: "Views/BundleTemp/_Js_Bundle.cshtml",
filename: `./../Views/Bundle/${BundleName}_Js.cshtml`,
chunks: ["libs/vue", BundleName],
inject: false,
})
);
});
};
setHtmlTemplates(getEntryFiles());
|
將進入點丟給 function,讓 fn 對每個進入點都處理一次 html 的 partial view,這些東西主要都是針對 CommonConfig 操作,而CommonConfig就是我們 webpack 的設定物件;也就是說,我們其實就是在 webpack 設定的plugin節點,重複的加入了很多個HtmlWebpackPlugin的設定
拿來當作template的 partiview 內容如下
Views/BundleTemp/_Js_Bundle.cshtml
1
2
3
| <% for (var chunk in htmlWebpackPlugin.options.chunks) { %>
<script src="~/Dist/<%=htmlWebpackPlugin.options.chunks[chunk] %>.js"></script>
<%}%>
|
內容是用 ejs 語法寫成,產出的結果會是這樣
1
2
3
4
5
|
<script src="~/Dist/libs/vue.js"></script>

<script src="~/Dist/Page/Home/index.js"></script>
|
動態注入 js 給 cshtml 更新作法
後來因為想要在瀏覽器 cache 上有比較好的體驗,所以希望在 js 的 querystring 後面加上 hash,又研究了一下,發現以我的需求,其實不需要用到 ejs 的 template,直接透過設定即可,在下面的部分重點就在於inject我改為body,讓外掛幫我把 script 注入,然後我給的範本是空字串,所以它直接在空字串內注入
1
2
3
4
5
6
7
8
9
10
11
12
13
14
15
16
| const setHtmlTemplates = function (entryFiles) {
entryFiles.forEach((filePath) => {
let path = /.*\/(Source\/Page\/.*?)\.js/.exec(filePath)[1];
let BundleName = path.split("/").splice(1).join("/");
CommonConfig.plugins.push(
new HtmlWebpackPlugin({
templateContent: ``,
filename: `./../Views/Bundle/${BundleName}_Js.cshtml`,
chunks: [BundleName],
inject: "body",
})
);
});
};
setHtmlTemplates(getEntryFiles());
|
另外在 webpack 的 output 設定,調整使用 hashcontent 即可根據內容變動產出 hash 在檔案路徑後方
1
2
3
4
5
6
7
| output: {
path: path.join(__dirname, 'Dist', 'Scripts'),
filename: '[name].js?v=[contenthash]',
chunkFilename: '[name].js?v=[contenthash]',
clean: true,
publicPath: '/Dist/Scripts'
},
|